Table of Contents
ToggleHow to install Security by CleanTalk Plugin to remove malware from your WordPress website
Every website owner faces a common problem with website security which can seriously damage your online presence. If you run a WordPress website, it’s important to take steps to protect yourself from these types of attacks. One of the best ways to do this is with a security plugin like Security by CleanTalk.
Security by CleanTalk is a popular WordPress security plugin that provides a range of features that prevent your website from malware and hacking attempts. This plugin installation process is very simple, this plugin is designed to be easy to use even for those new users to website security. One of the main features of Security by CleanTalk is the malware scanning feature. This powerful tool can scan your website to remove malware and restore your website to a safe state. What’s more, the plugin can automatically scan your website for new malware, remove them in real-time, and protect your website 24/7.
Let’s learn how to install the Security by CleanTalk plugin on your website:
First, Go to your WordPress dashboard and Follow the steps.
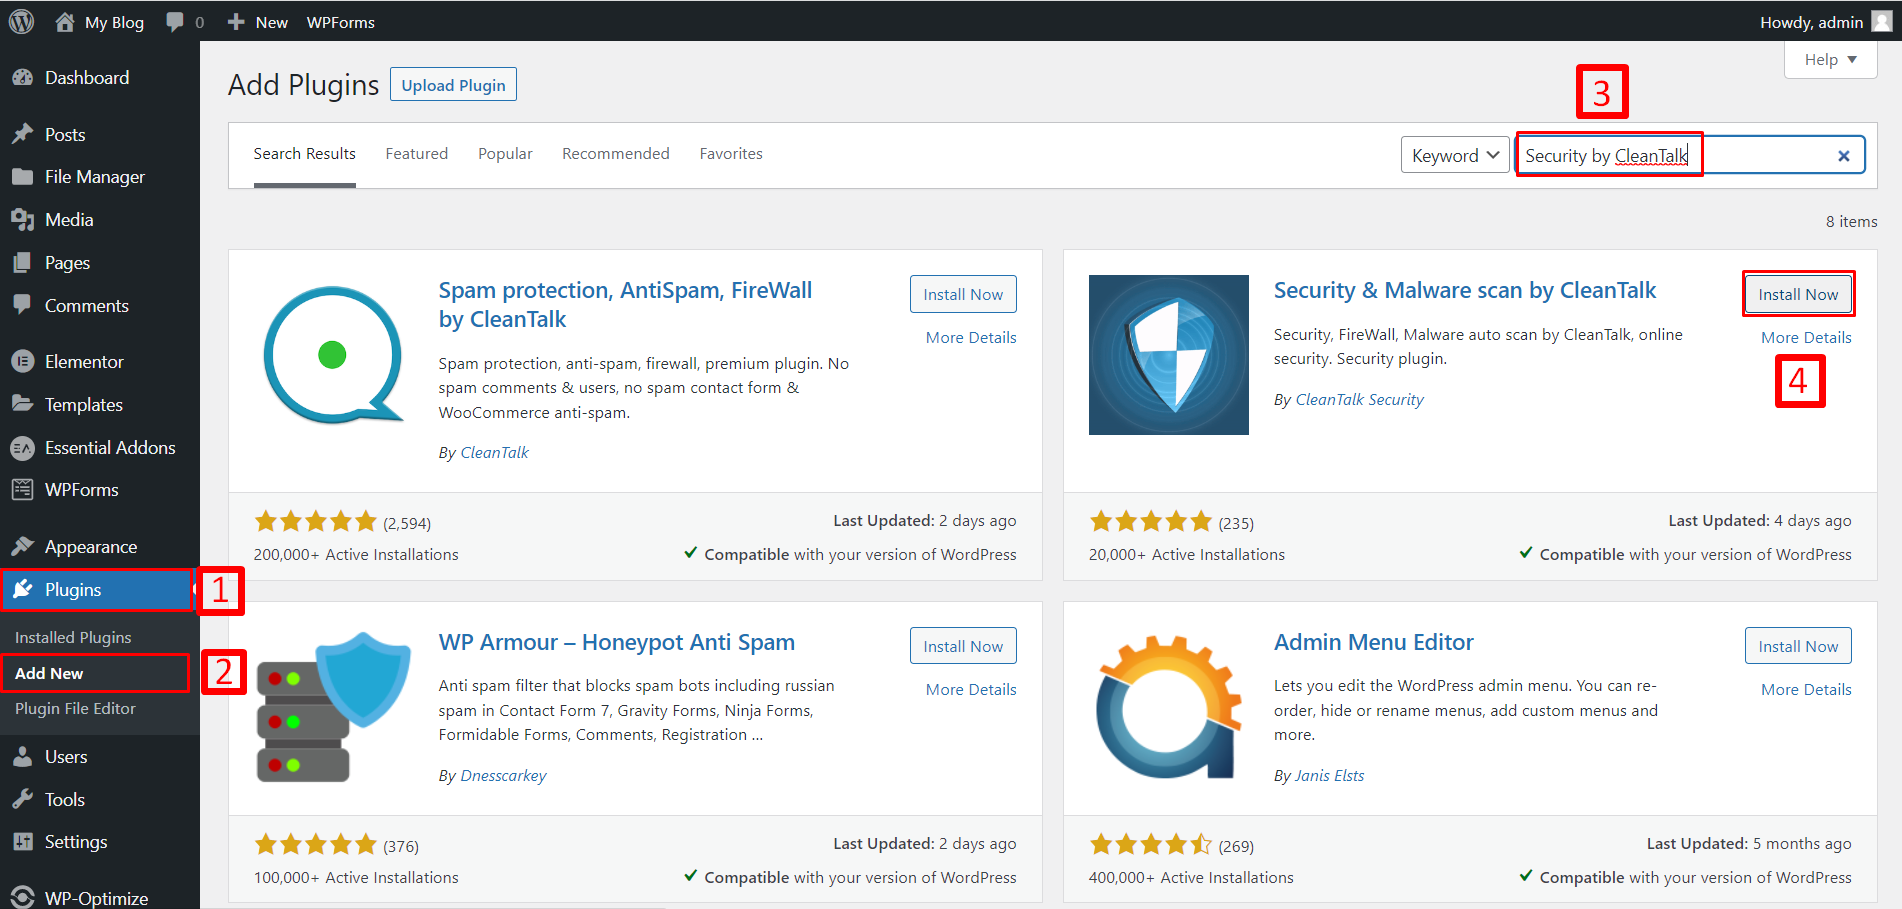
- Go to Plugins
- Click on Add New
- Search for the “Security by CleanTalk” plugin,
- Click on the “Install Now” button and install it.
Then the installation process takes some time so wait a few moments. After that click to activate the plugin. Now the installation process is complete. You can see the plugin below.
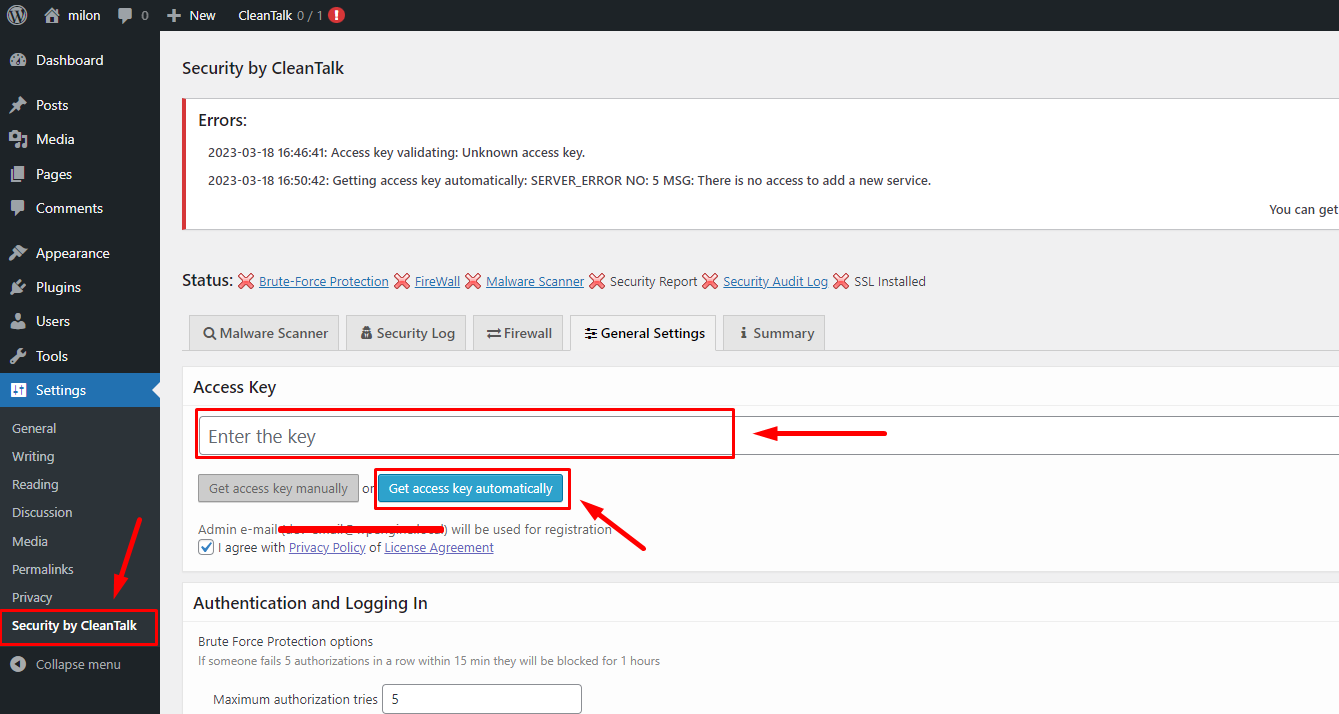
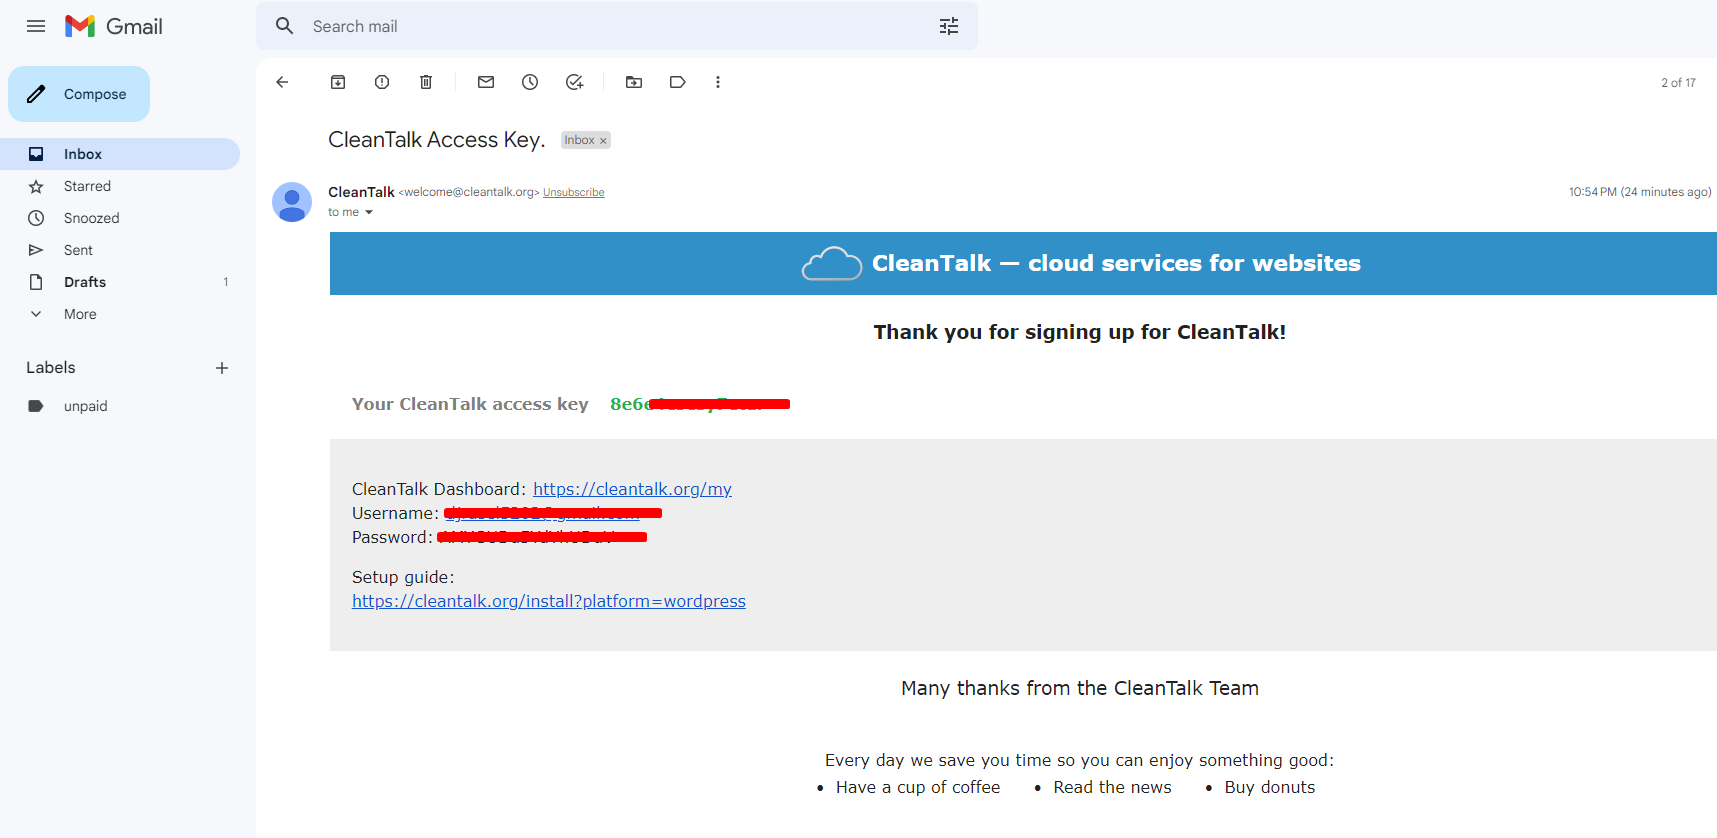
But your security plugin doesn’t work because this security plugin needs an Access key. So Click the “Get access key automatically” to generate the access key. after a few moments, your plugin will be fully activated. If your fail to generate an access key check your WordPress email list. The security company sent you the access key to your email address. See my email inbox, the security company sent me an access key.
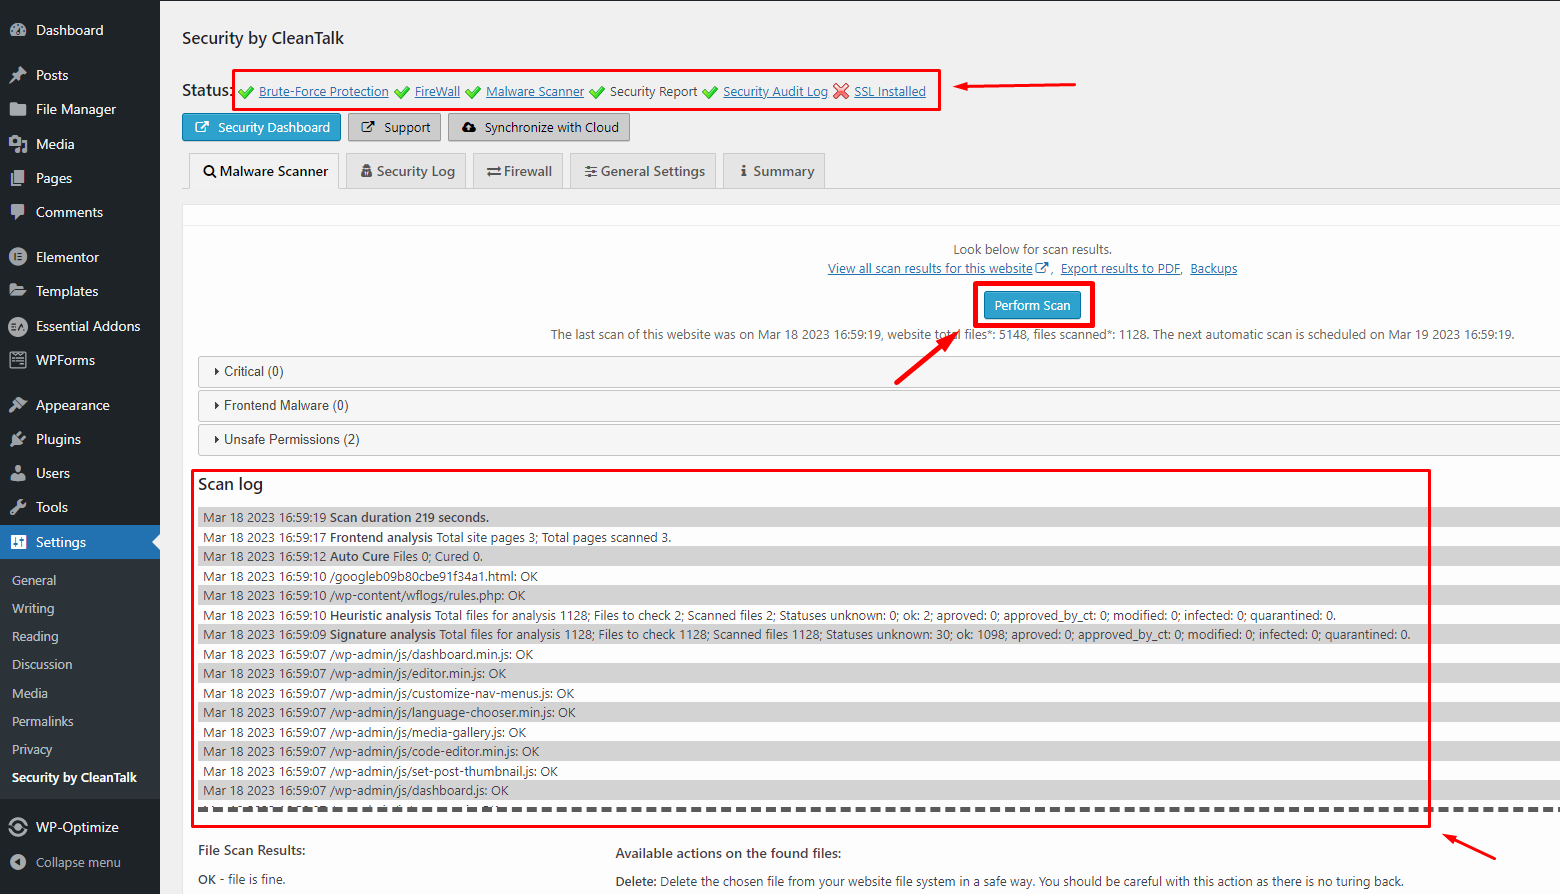
Scan website and remove malware
First, Go to your Security by CleanTalk Dashboard and click the “perform scan” button. you will see the scan process will be started. After that, you will see the scan log. our website is clean that’s why you cannot see the malware. And also you can see the status of your website.
but if your website has malware then you will see the result “scan log” like that.
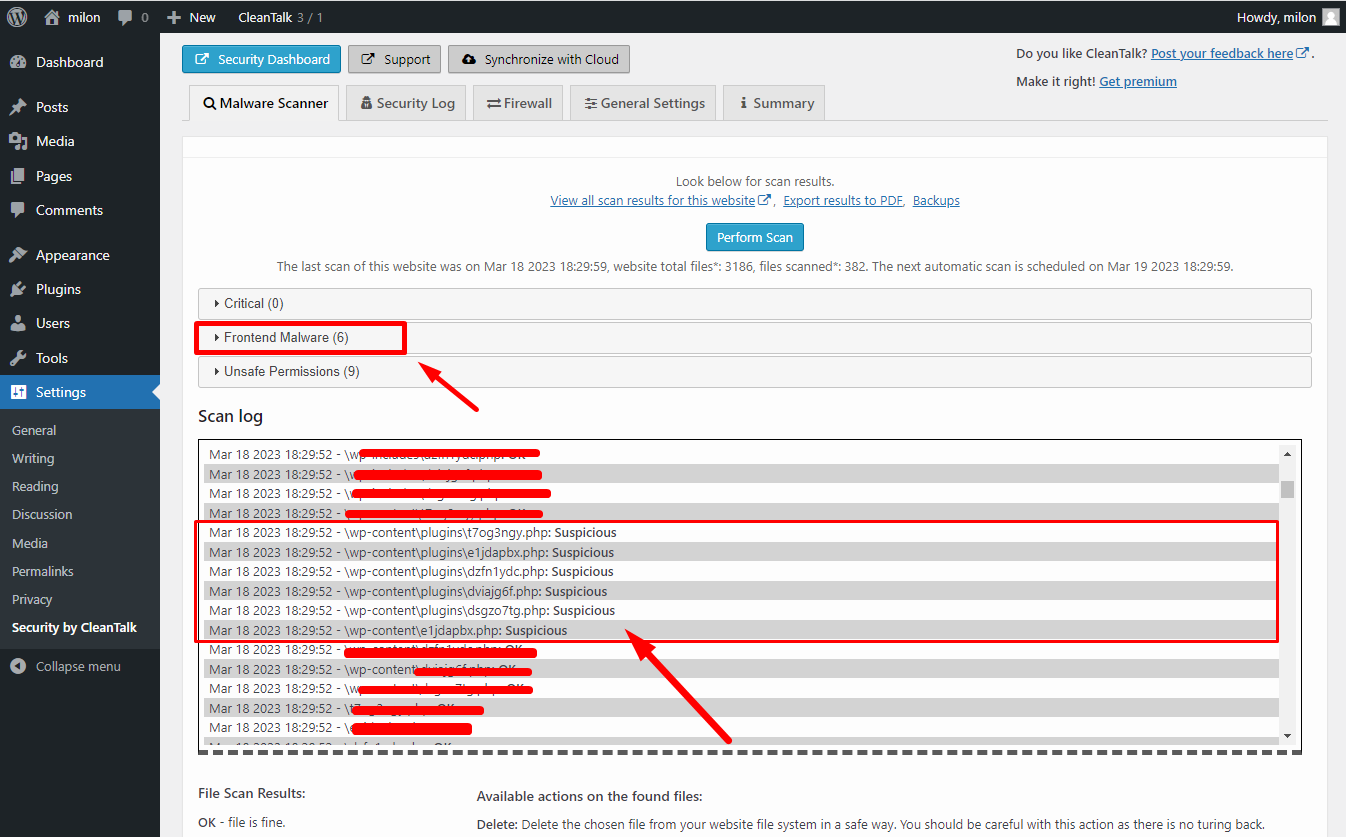
Now you can see the location of the malware. If you remove the malware you need to enter your hosting panel and go to your file manager.
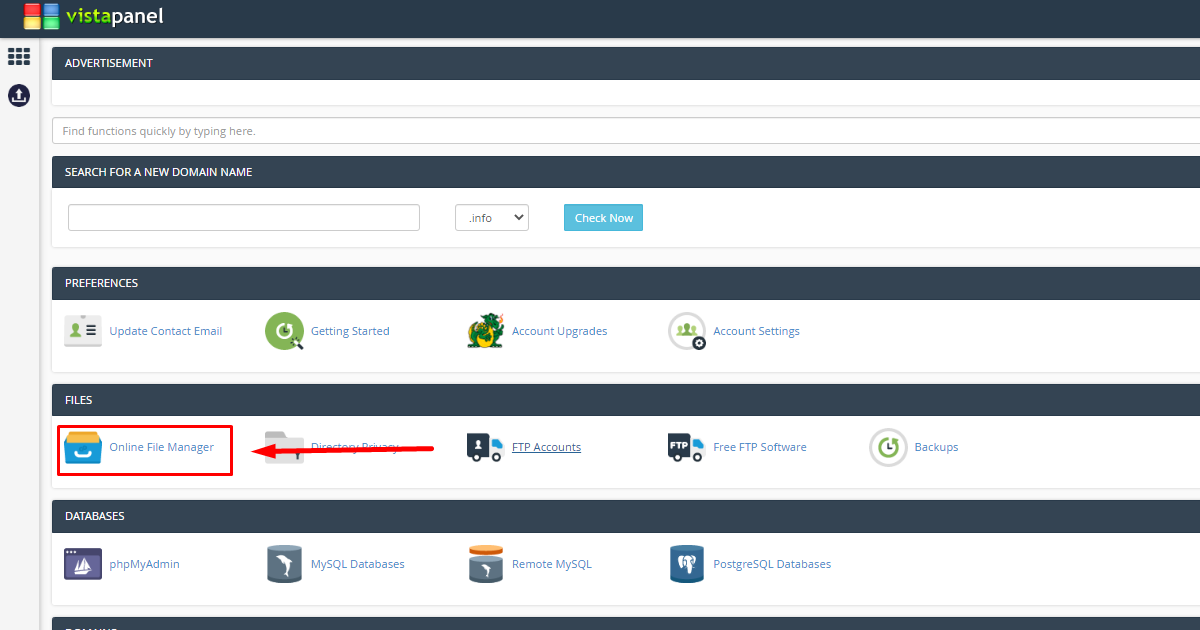
By entering the file manager you will find the location of the malware. We found the location of our malware inside the wp-content of htdocs.
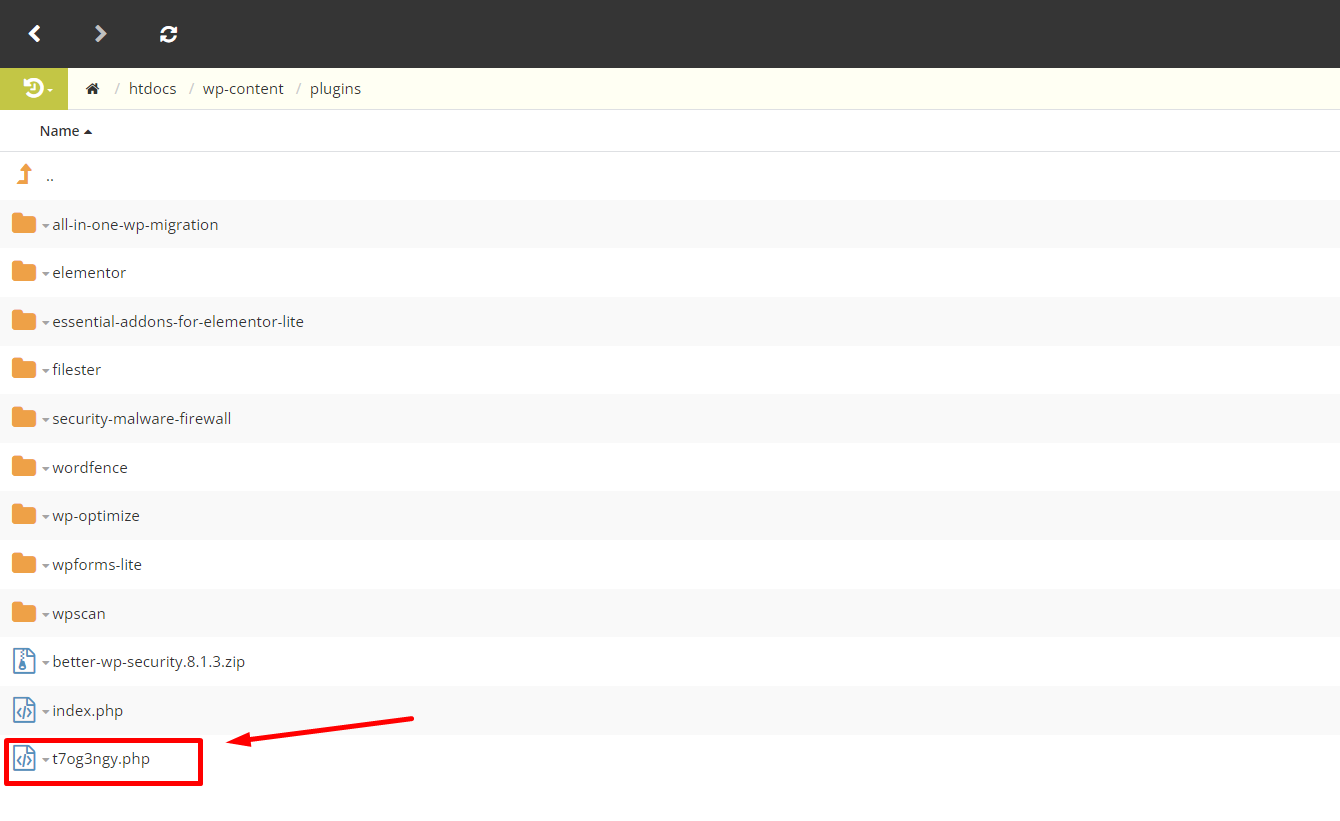
This is the malware, now it’s time to delete it, now if you click the right button on the malware, you will see the delete option.
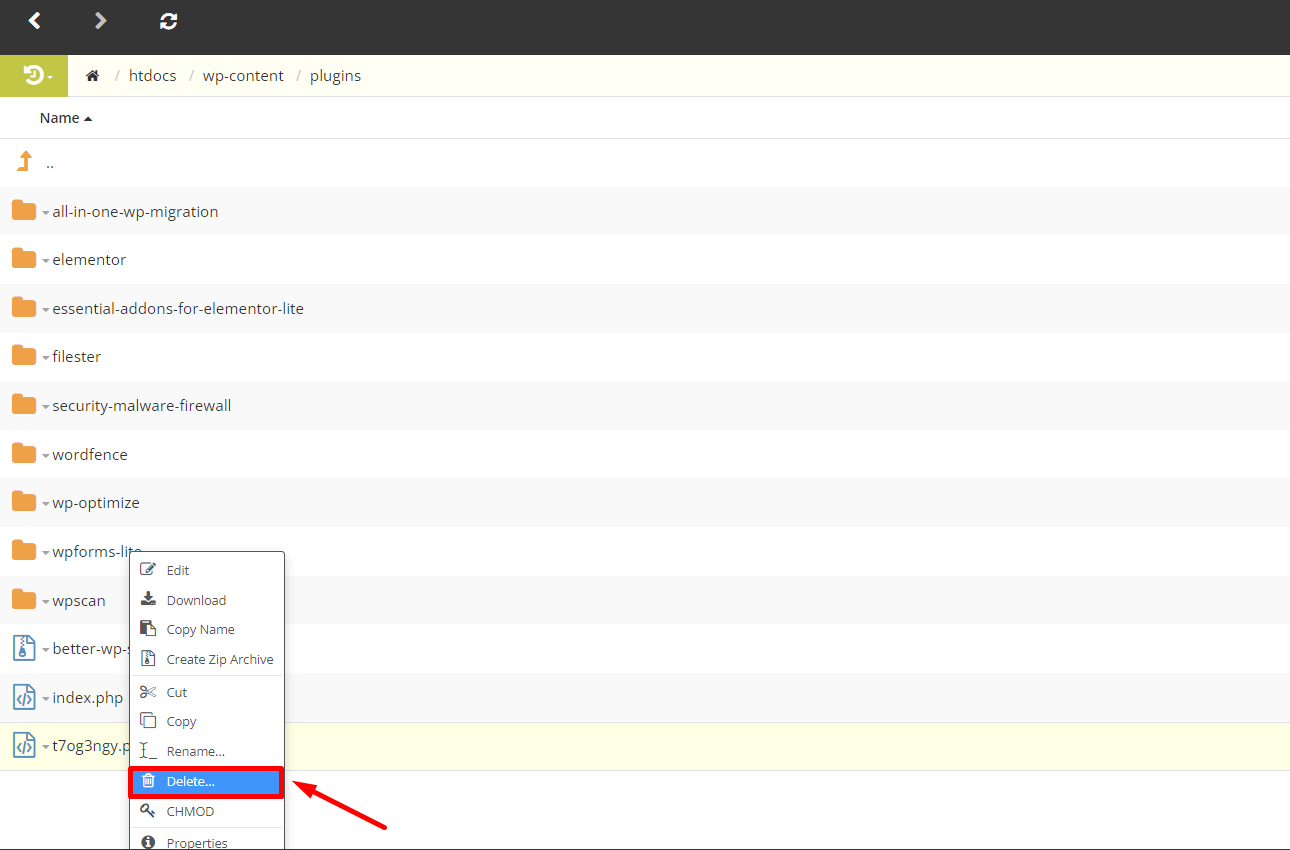
If you confirm the delete option, your malware will be deleted completely.
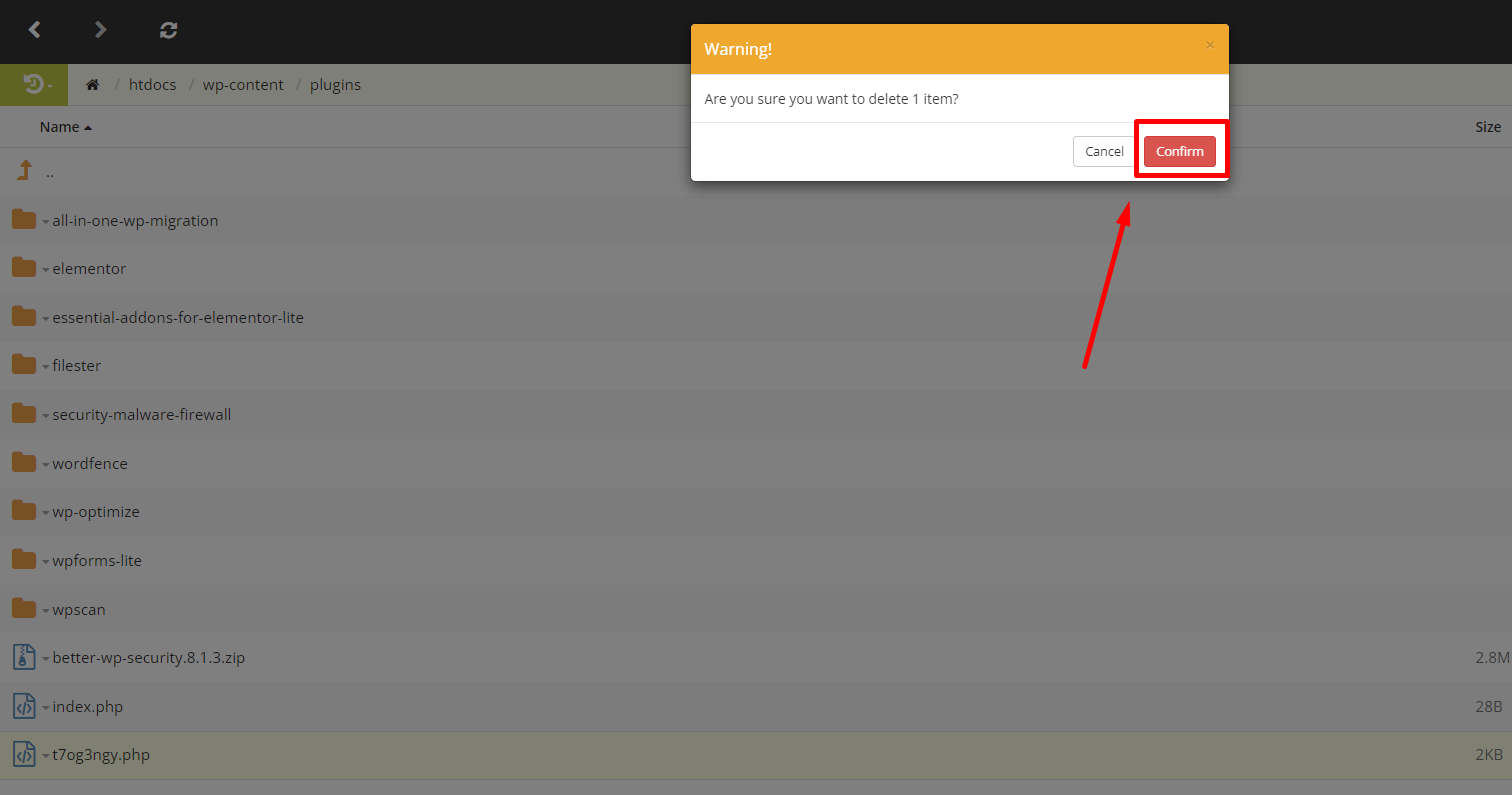
In this way the website can be kept completely malware free by locating and deleting the malware in a very short time.
Other features
This plugin has not only a malware scanner but also build in other features. You can set your plugin with other features for your as you need. This plugin has amazing features. Let’s see how to set up other features as you need.
Firewall
Every website needs a firewall. because the firewall is important for all WordPress websites if you do have not a firewall then malware attacks your website easily and will be hacked easily. This plugin has a lot of functions so set up the firewall as you need.
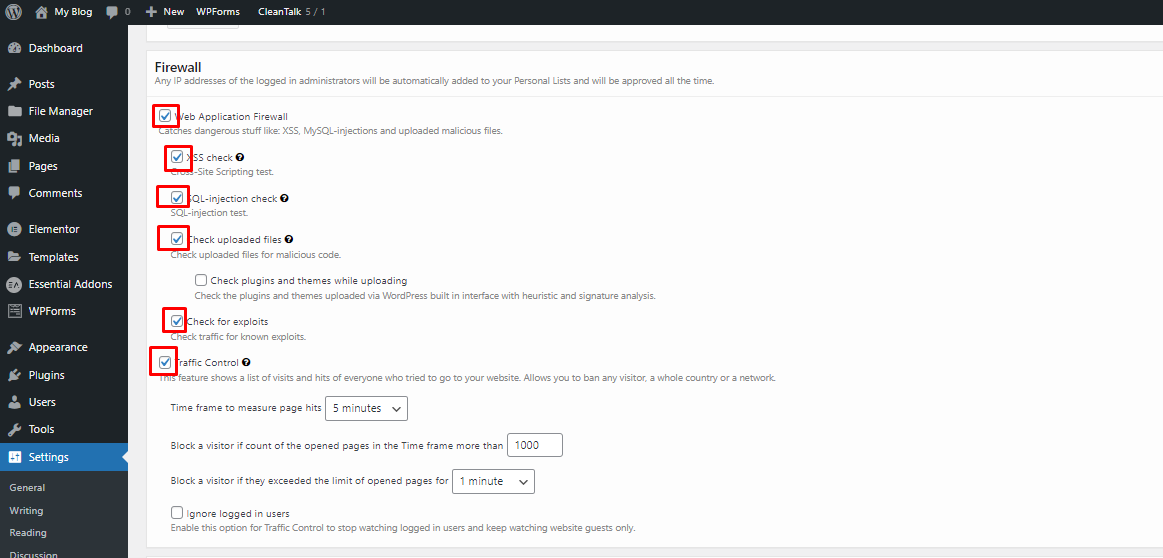
Login Authentication
If you want to secure your admin panel and prevention for hacking you can set up login authentication on your website. The setup process is very easy. If you want to setup then follow the process.
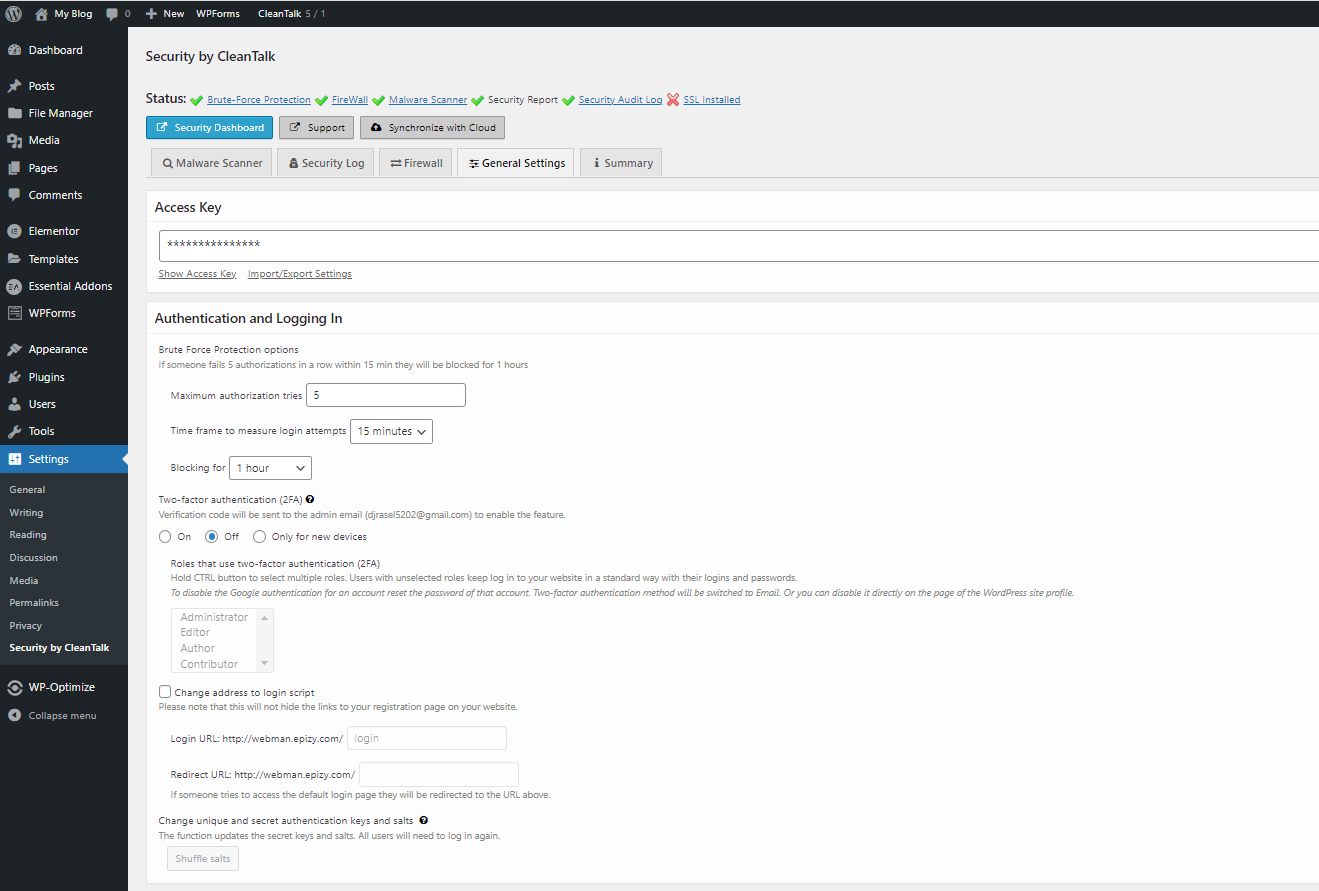
1. Set the number for maximum authorization tries.
2. Set a time frame to measure login attempts.
3. Then Set how many hours you want to block each IP.
4. Click the radio button “on” to activate the authentication
5. And to scroll down to save it.
That’s it now the login authentication system is completely activated.
