Table of Contents
ToggleMalwarebytes blacklist removal | How to remove the blacklist on Malwarebytes after removing malware from the WordPress website
Many times the website owner suffers from a common problem. Visitor complains that they are facing a security warning from Malwarebytes when they visits the website. This is when a website was attacked by malware and after removing the malware. This problem is not very difficult to solve but this problem is very terrible. Because the visitor loses confidence in this website and the website’s reputation is lost. Know why this is? If a website is blacklisted by an antivirus vendor, it means that the site has been identified as hosting or distributing malicious software or engaging in other malicious activities. These activities could include phishing, spamming, or distributing malware through malicious ads, downloads, or other means.
By blacklisting a website, an Antivirus vendor is warning its users not to visit the site, as it poses a potential threat to their computer and personal information. So the website will not only remove the malware. Antivirus vendors need to know that there is no malware on your website. One such popular antivirus company is Malwarebytes.
In this tutorial, How to Submit “report a false positive” after removing malware on your website let’s see.
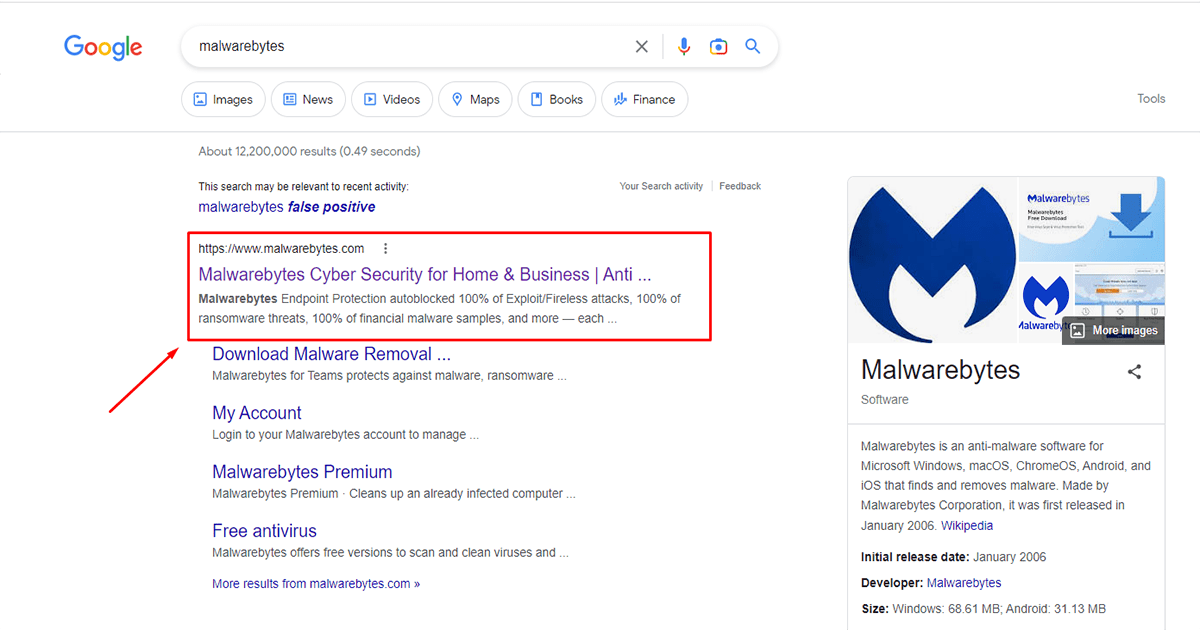
First, Go to your google search engine and search “Malwarebytes” and enter. You can see the link below, click on the link.
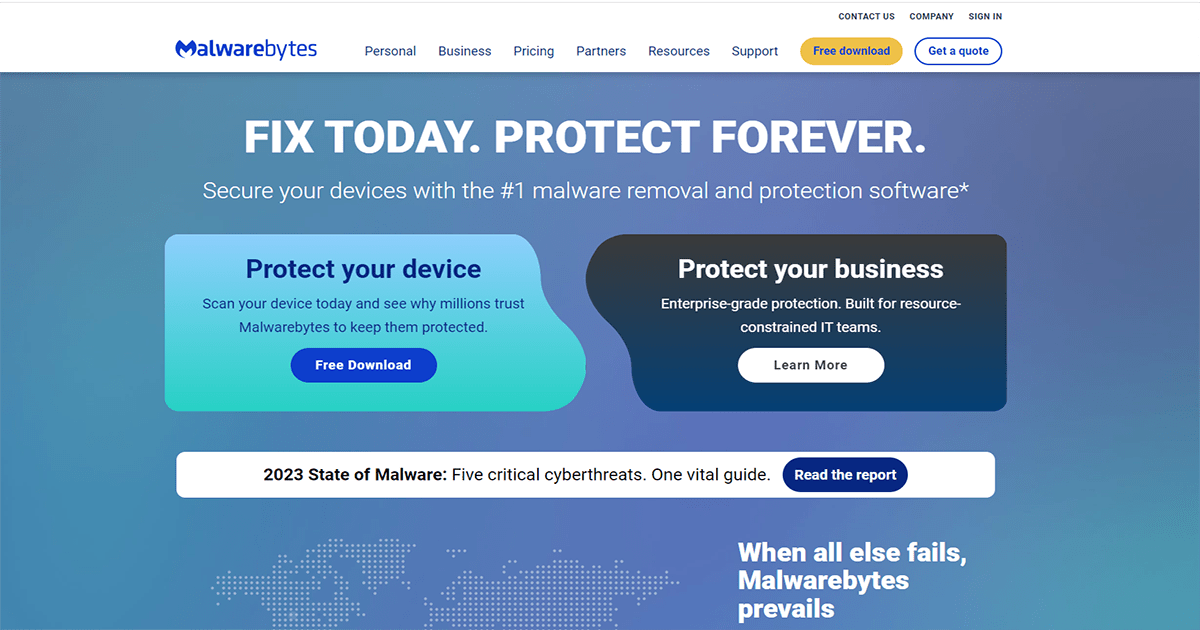
Entering the home page of Malwarebytes, you will see the home page. Scroll down and go to the footer area.
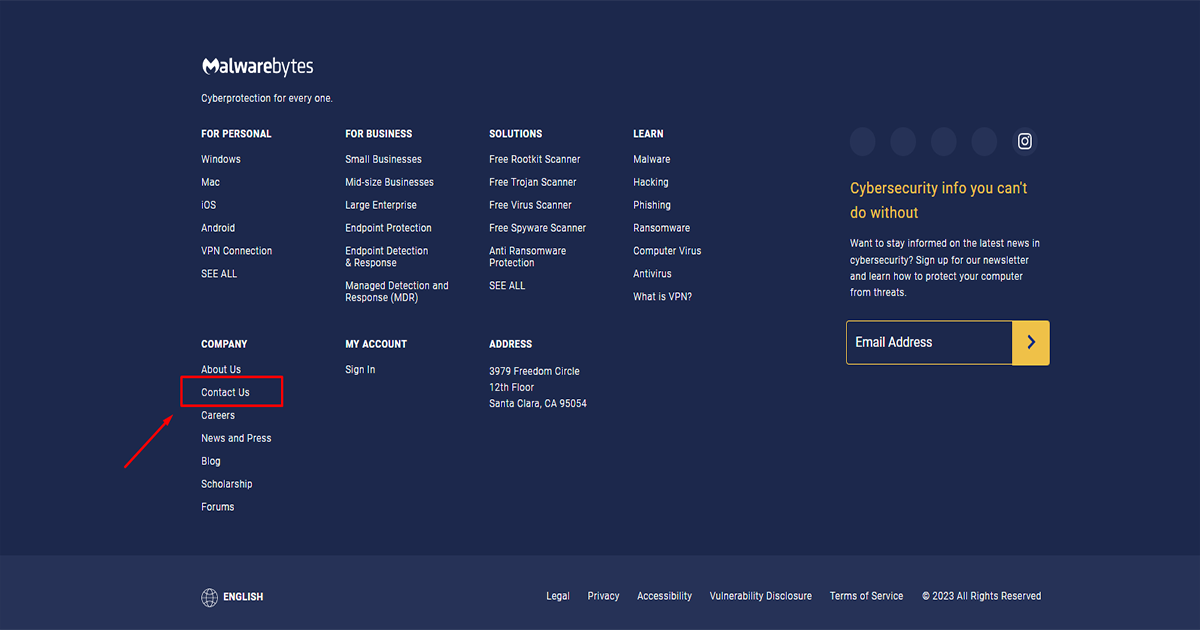
After coming to the footer area. Here you will see the link “contact us” click the link and visit the next page.
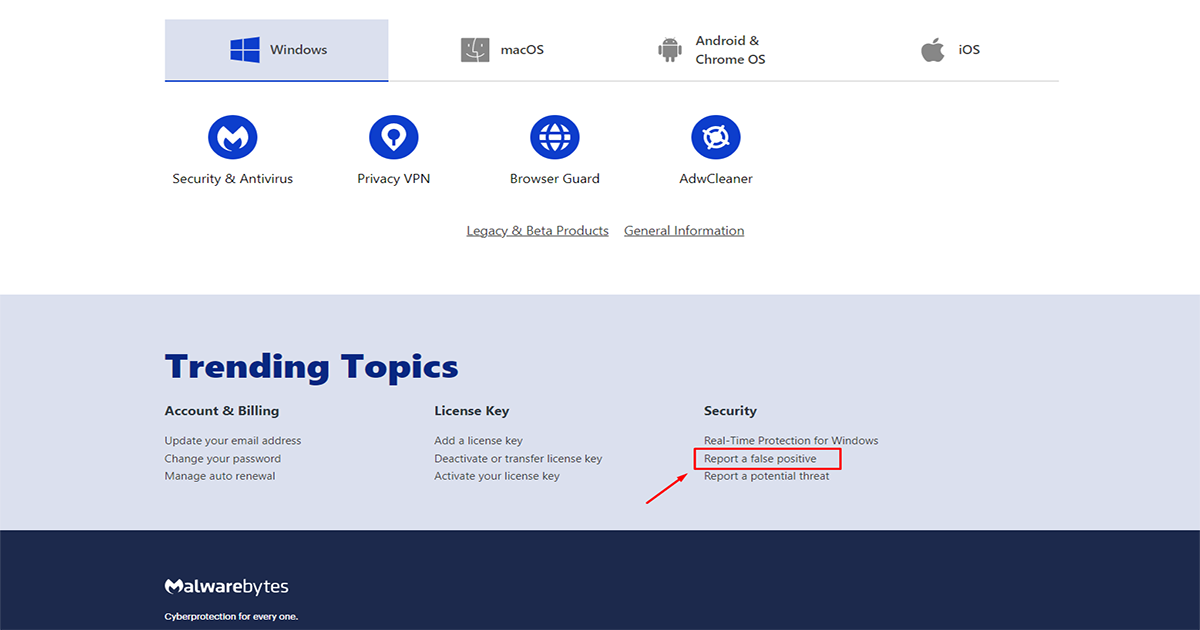
After going to the next page you will see the headline “Trending Topics” and below the headline, you will see the sub-headline named “Security”. Now click the “Report a false positive” link in the Security sub-headline.
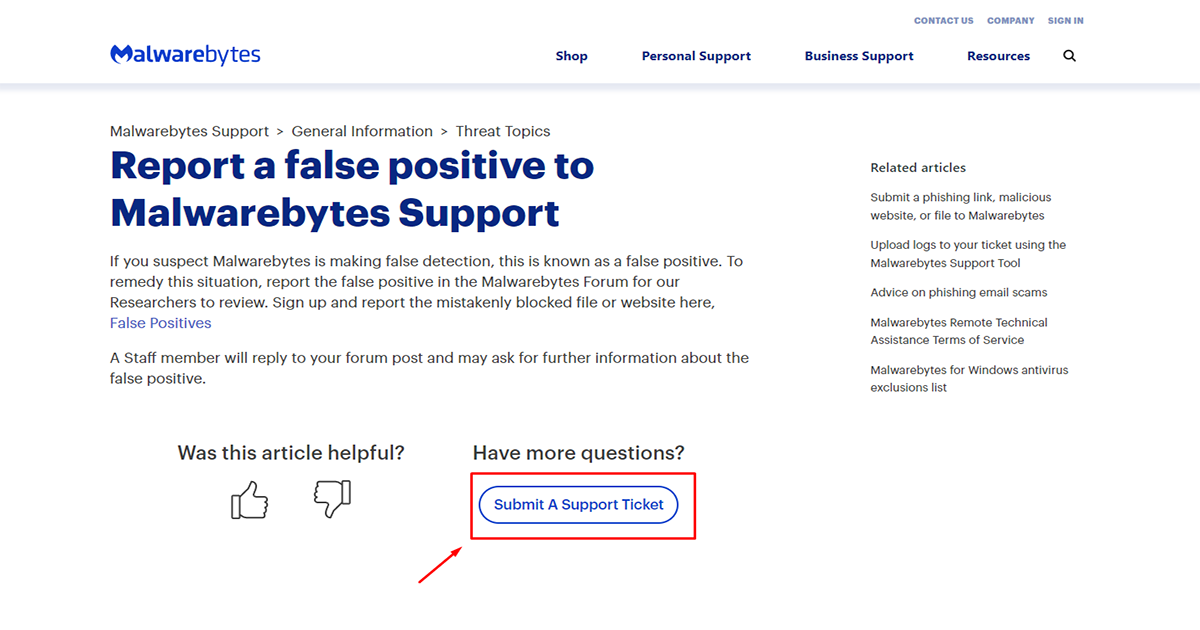
Then you will see the “Submit A support ticket” button on the next page click on the “Submit A support ticket” button.
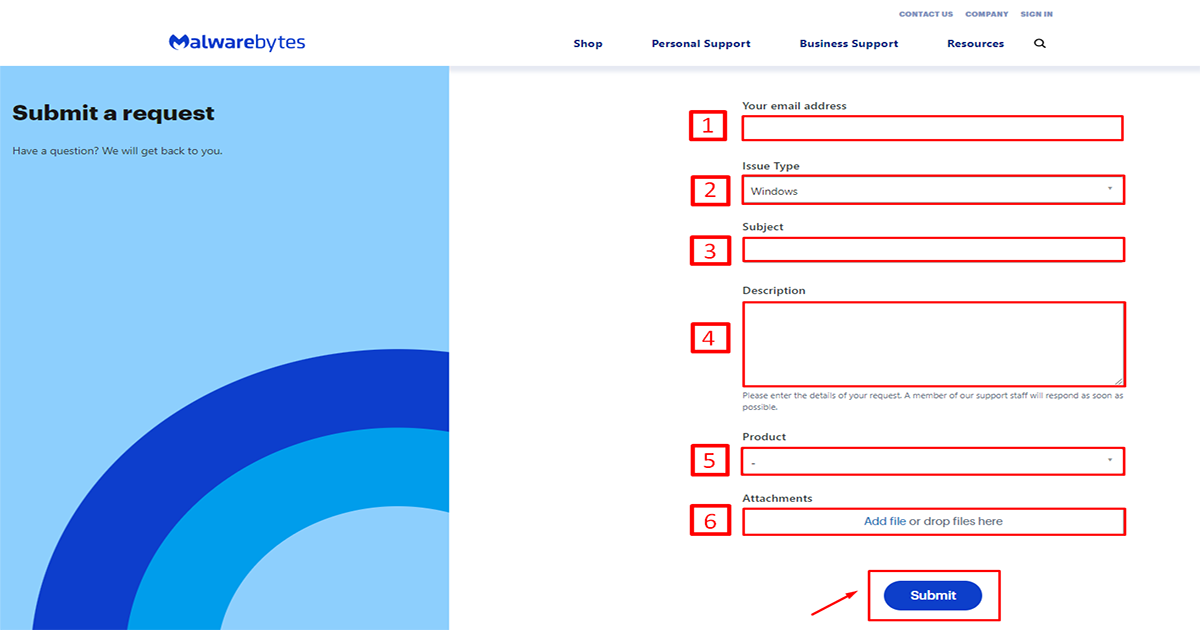
It will appear as a form there. Fill out the form with as much information as possible, including your name and email address, the name of the file or website that was falsely detected, and any relevant details or comments. Attach any relevant files, screenshots, or logs that can help support your case and click on the submit button to complete the process. Now the report is successfully submitted. wait for a response from Malwarebytes and they will send you an automated email.
Note: It is important to provide as much information as possible to help Malwarebytes quickly and accurately investigate the false positive. Once they have reviewed the information you provided, they will take appropriate action to update their detection database as necessary.
And if you are a Malwarebytes user, you can whitelist your website to Malwarebytes software and browse the website until Malwarebytes updates its database.
In this tutorial, how to whitelist a website from Malwarebytes. Let’s see
First of all, go to your Malwarebytes software and Click on the arrow spot.
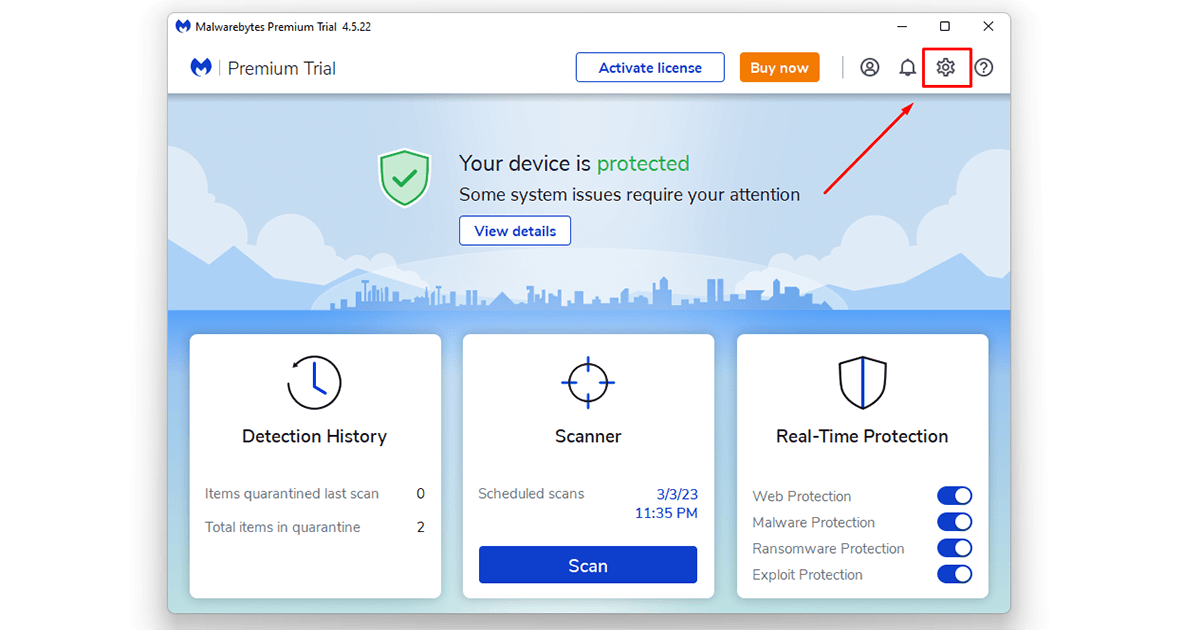
Now you’re entering the Settings option, Click on the “Allow List” option.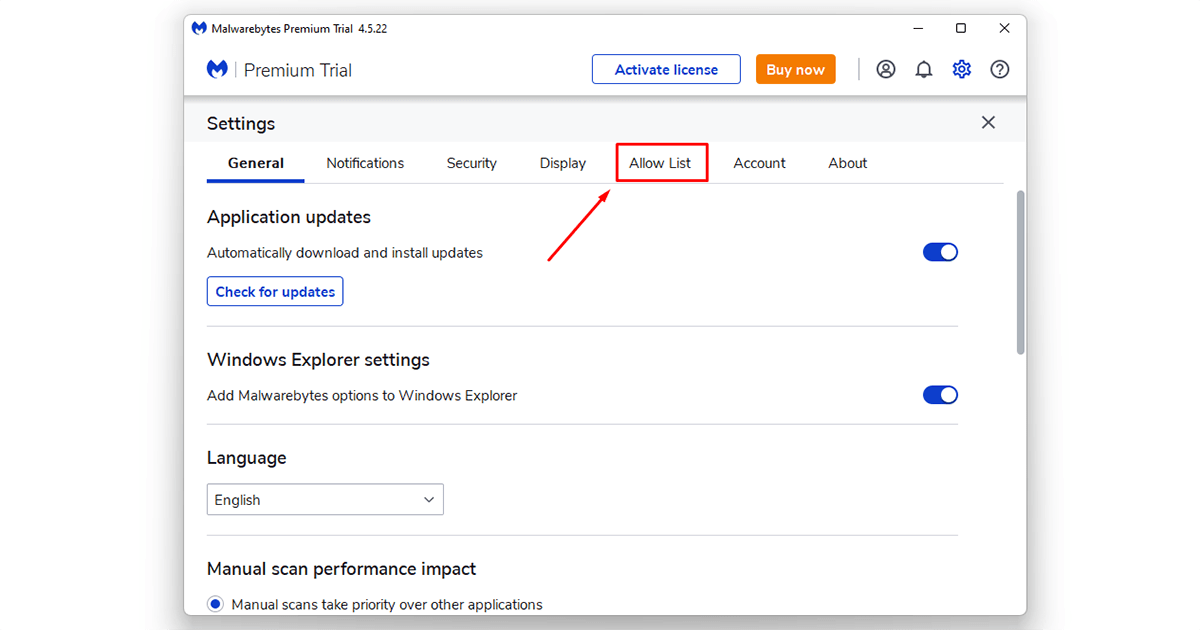
Then click on the add button.
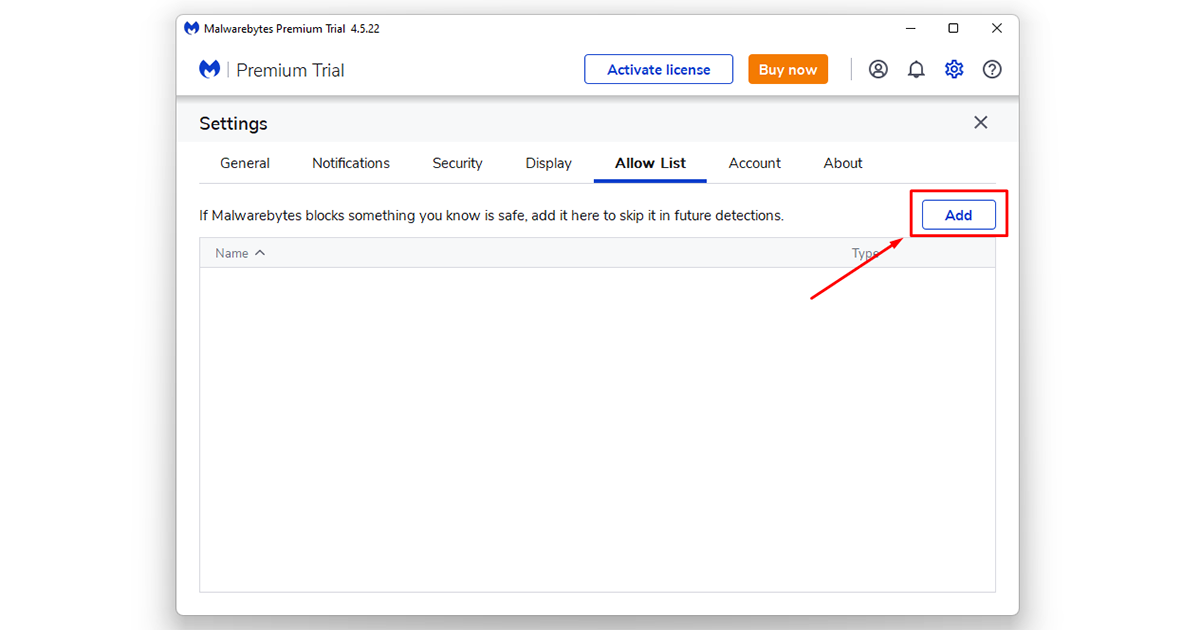
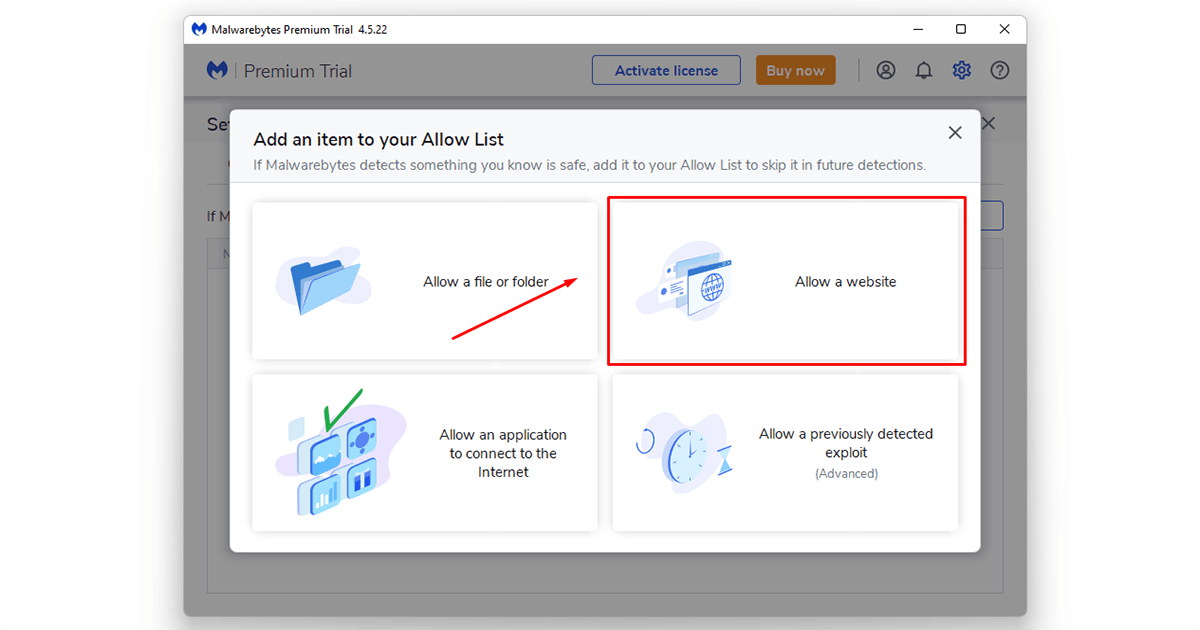
Select your item to the “allow list”
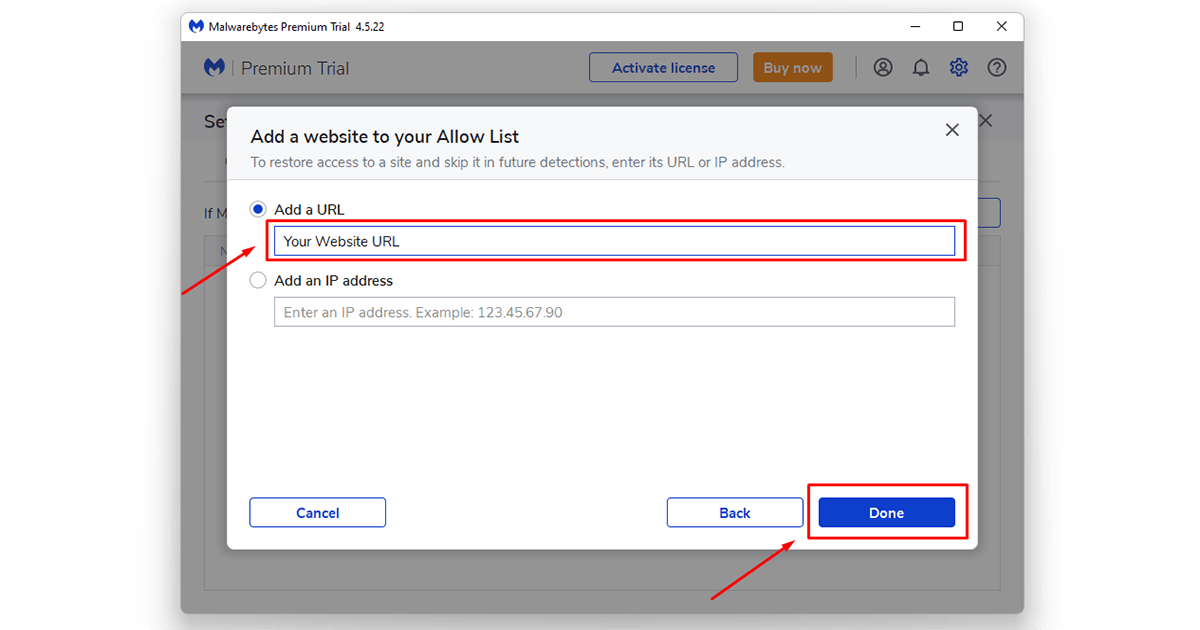
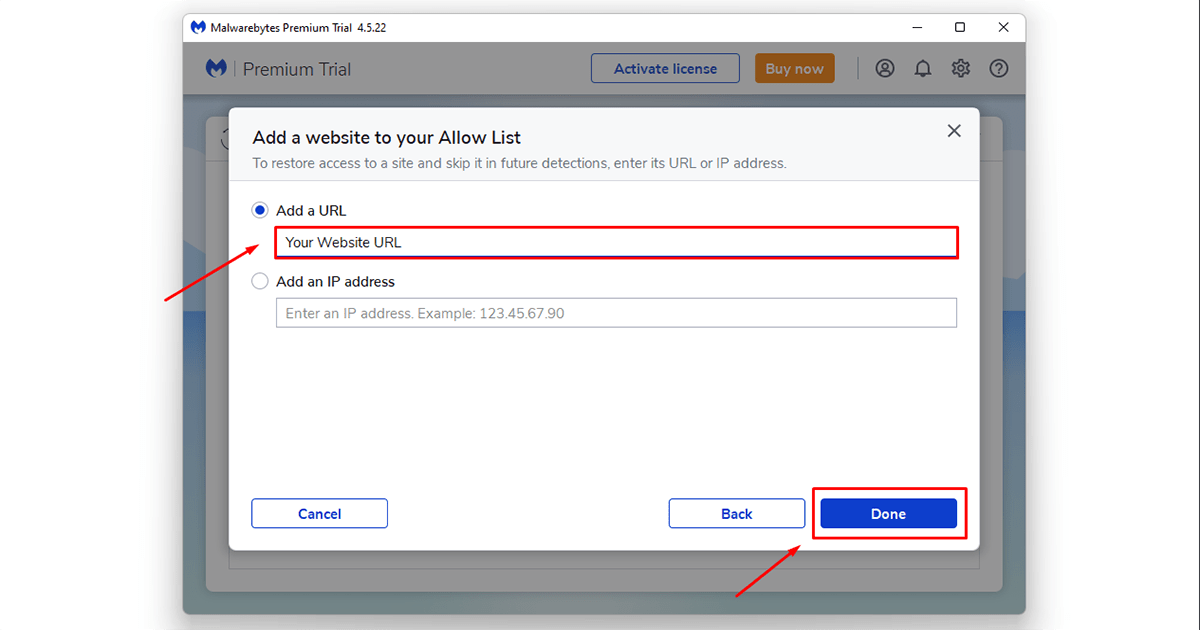
Enter your website URL or your IP address and to save it click on the “Done” button. Now the process is successfully saved.
Or you can also do this in another way. Let’s see go to your Malwarebytes software and Click on the “Detection History”
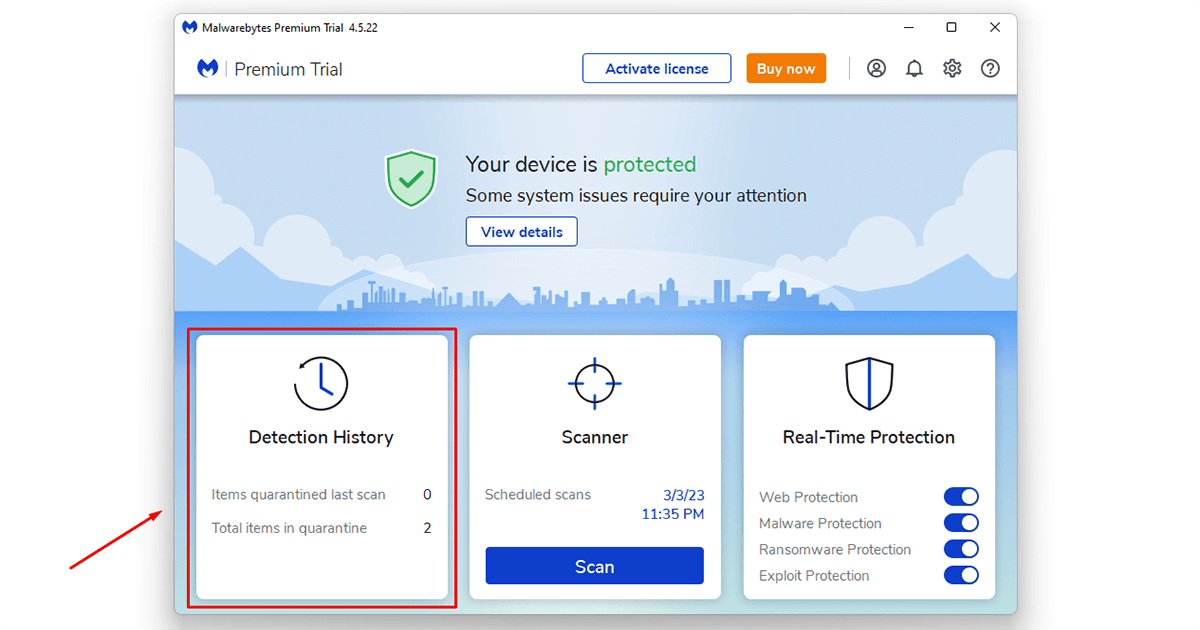
Then click on the “Allow List” option.
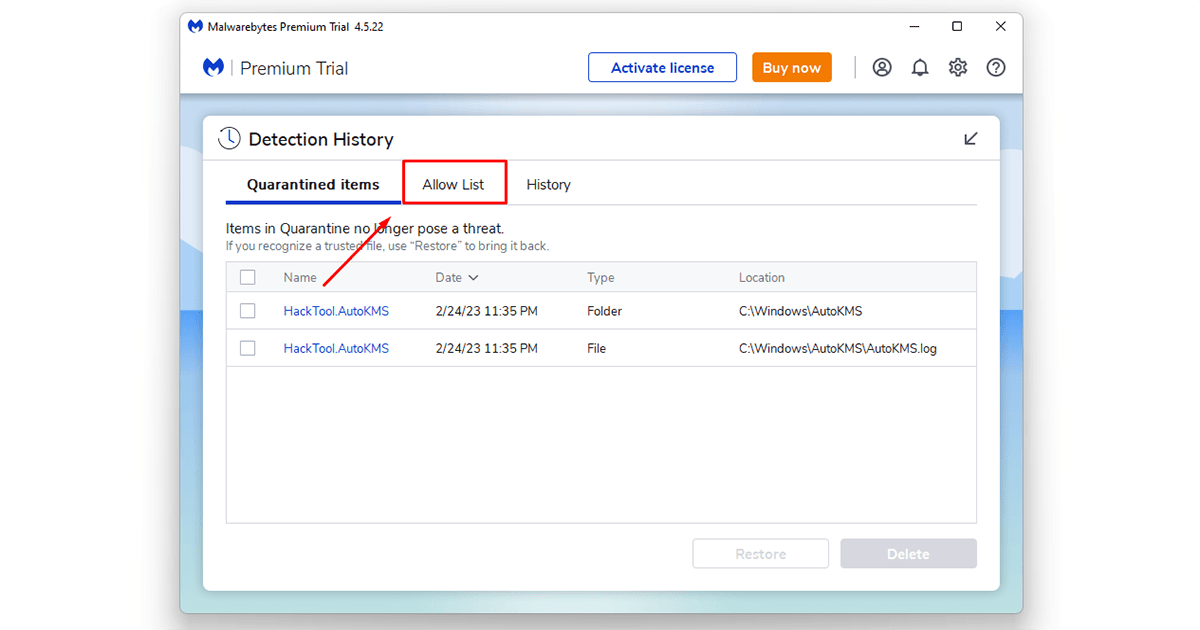
After that click on the add button.
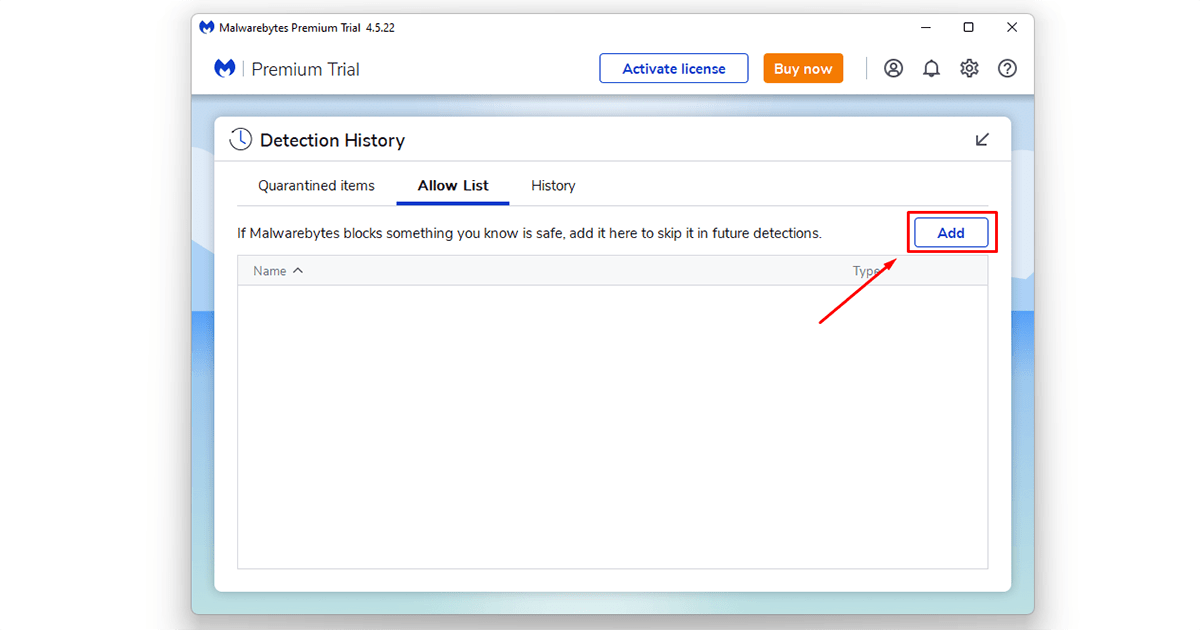
Select your item to “allow list”
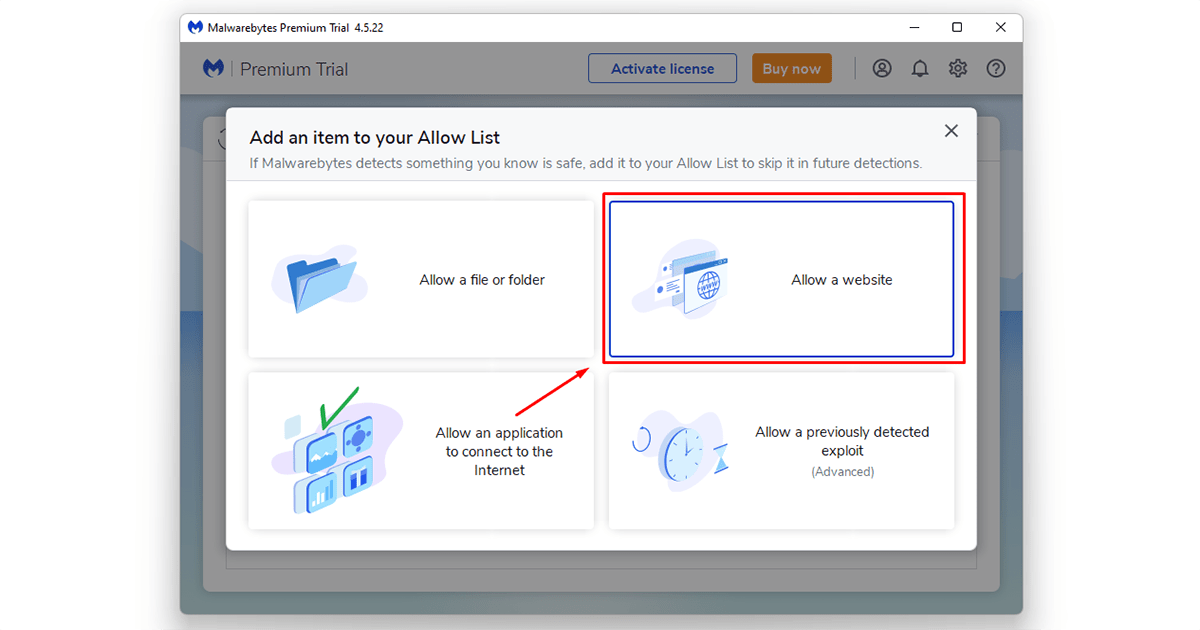
Enter your website URL or your IP address and to save it click on the “Done” button. Now the process is successfully saved.
Note: After that, if there is a visit to any website problem then you can talk to their support team to solve the problem.
NEED EXPERT HELP TO
Malwarebytes Blacklist removal
If your website has been blacklisted by Malwarebytes, you may be experiencing a significant drop in traffic and revenue. Don’t panic! With our expert Malwarebytes blacklist removal services, we can help you get your site back up and running in no time.

