Table of Contents
ToggleHow to use Shield Security Plugin to remove malware from your WordPress website
Shield Security is a plugin for WordPress that provides a comprehensive range of security features to protect your website from hackers, malware, and other online threats. This plugin is a must-have for anyone who wants to keep their website safe and secure. This security plugin provides not only malware scanning but also website firewall(WAF), Brute Force Attacks Protection, DDoS Attack Mitigation,IP Allowlisting, Bad Bot Blocking and other security features. Both free and premium versions are offered. Now we have to learn how to scan malware in your website with the Shield Security plugin
Before scanning malware in your WordPress use Shield Security. you need to install it. let’s learn how to install the Shield Security plugin on your website:
First, Go to your WordPress dashboard and Follow the steps
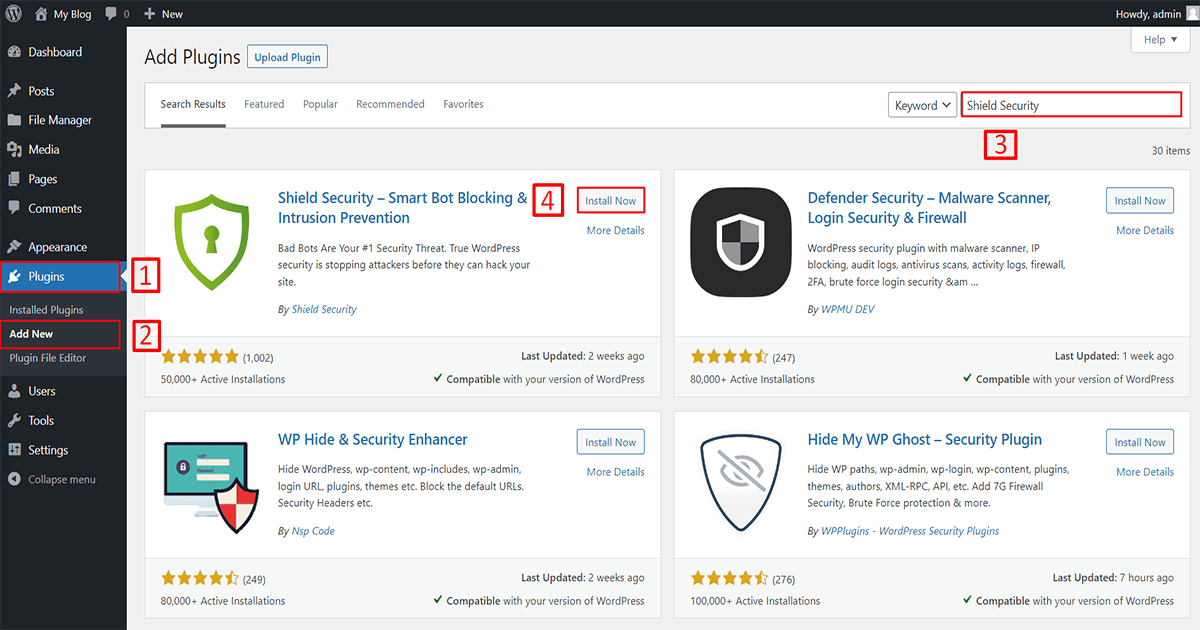
1. Go to Plugins
2. Click on Add New
3. Search for the “Shield Security” plugin,
4. Click on the “Install Now” button and install it.
Then the installation process takes some time so wait a few moments. After that click to activate the plugin. Now the installation process is complete and you can see the plugin below but the plugin not working because the plugin needs to be config. let’s learn how to configure it.
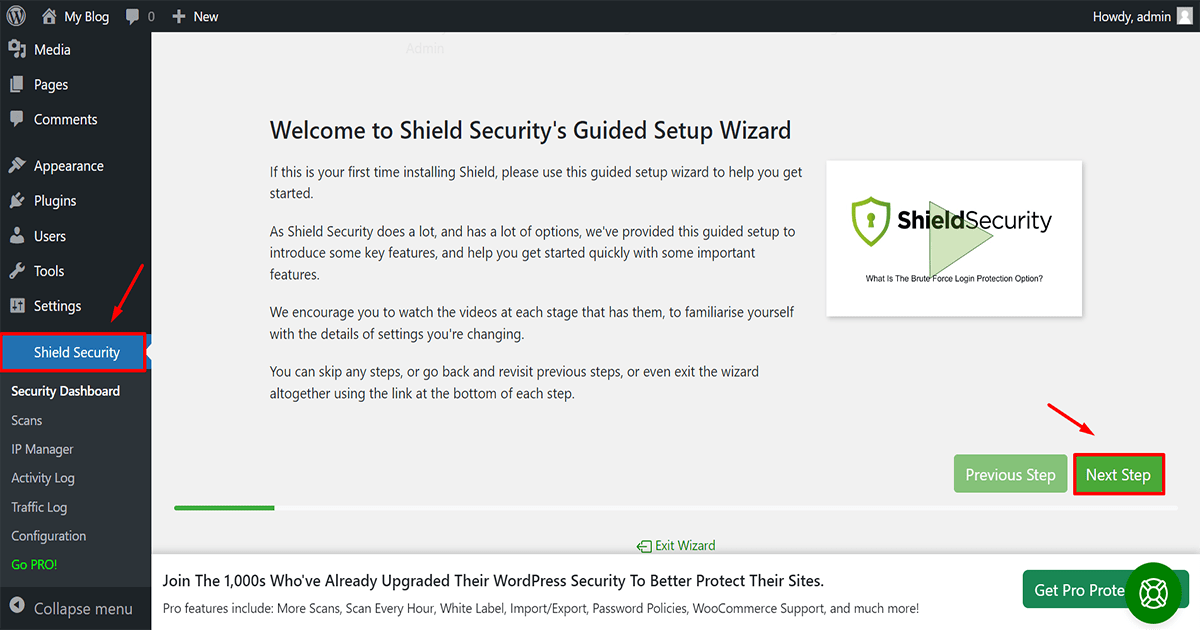
Go to your shield security and click the “next step” button.
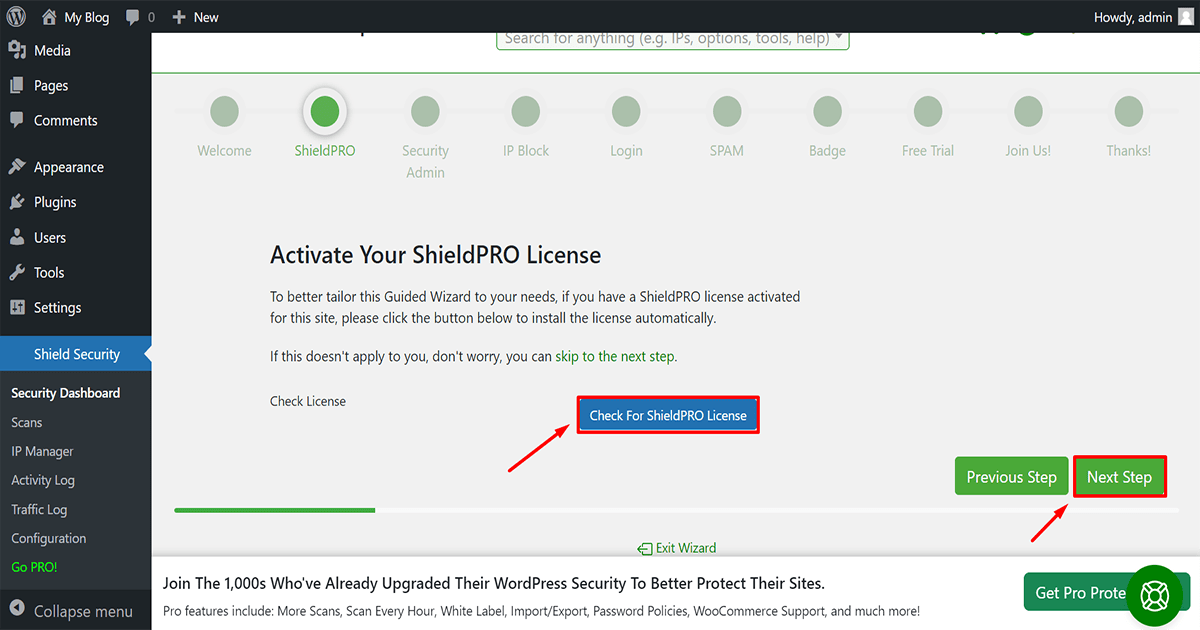
If you want to buy a premium license then click “Check for shieldPRO License” or if you are a free user then click the “Next Step” button.
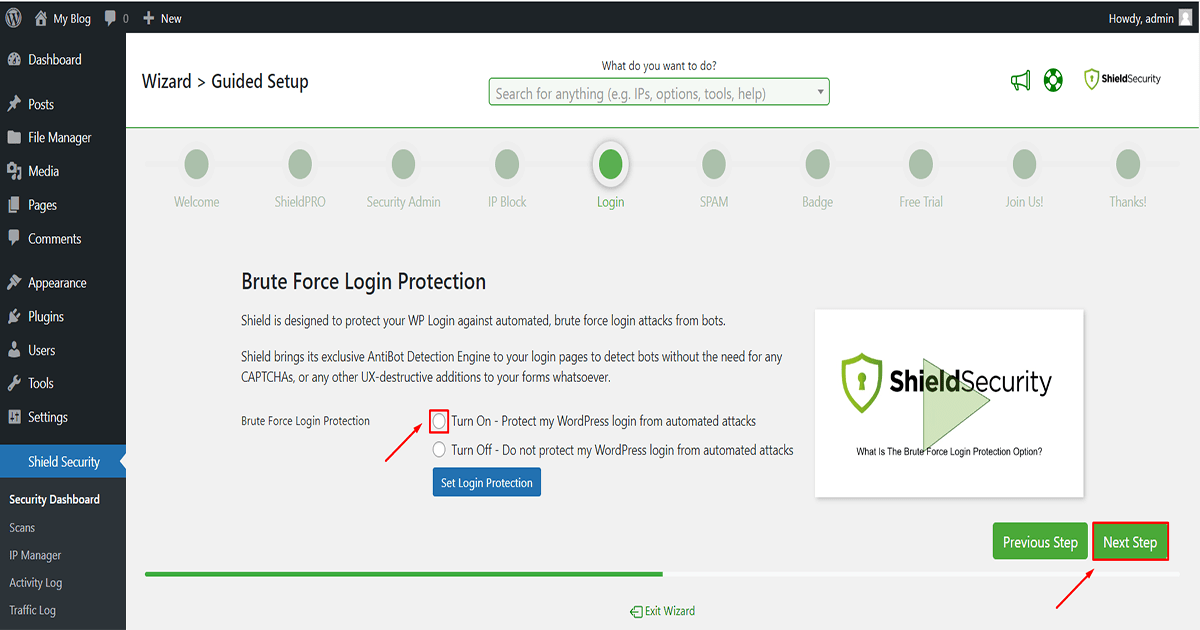
Brute Force Protection – shield security helps protect your website against brute force attacks by limiting the number of login attempts that can be made within a certain timeframe. This prevents hackers from guessing your login credentials and gaining access to your website. You should turn on it and click on the next step.
After 10 steps click on “Go To Shield Overview” and complete the configuration. Now the configuration is successful and it is working perfectly.
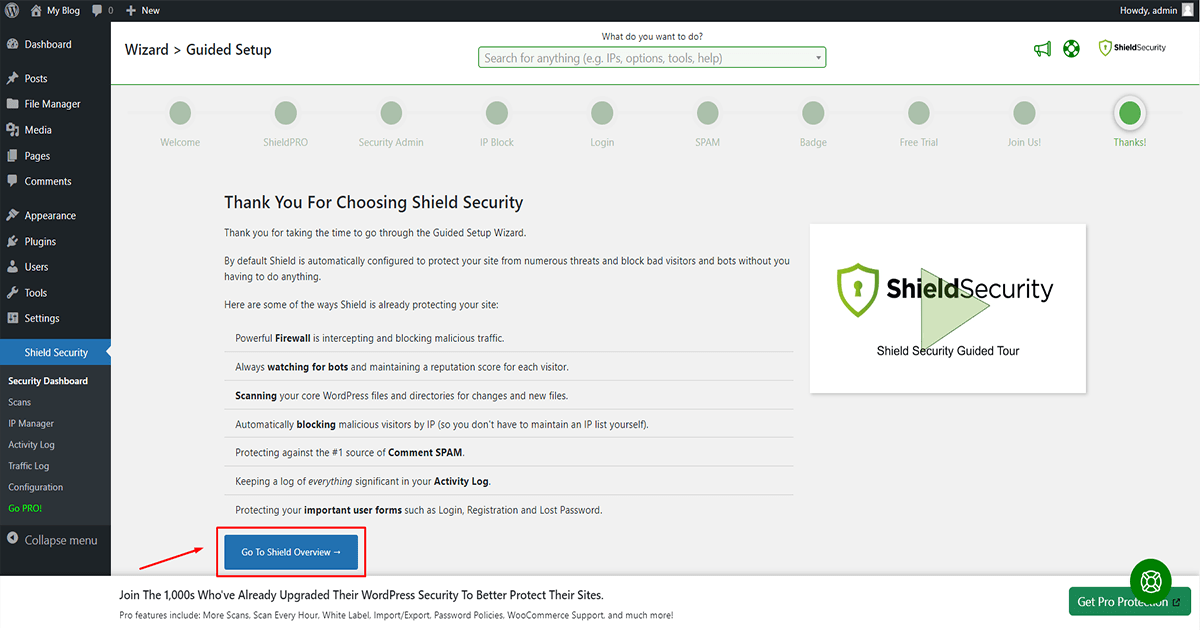
Now it’s time to scan for malware on your website.
First, Go to your WordPress dashboard and Follow the steps
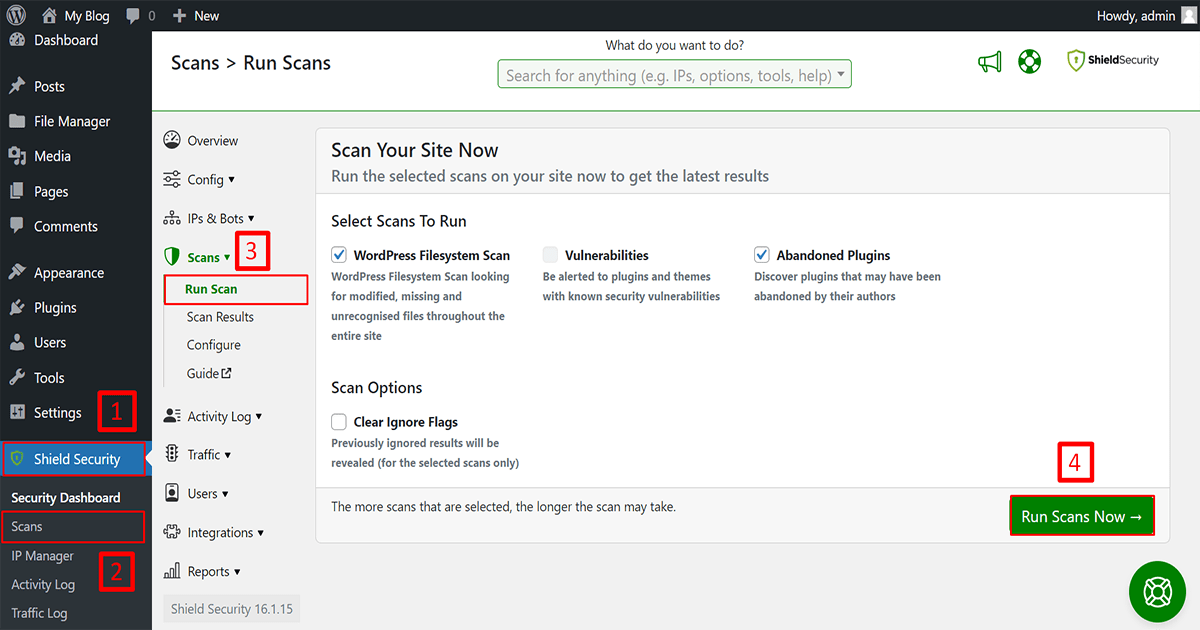
1. Go to shield security
2. Click on Scans
3. after that click on run scan
4. and press to the “run scans Now”
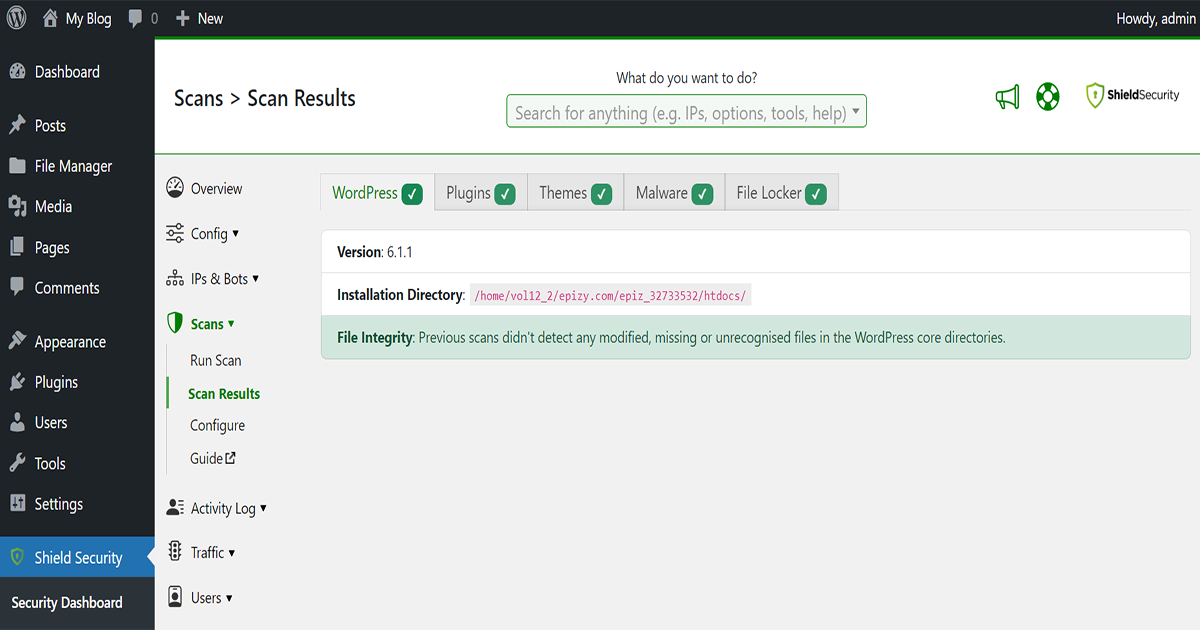
Now it’s time to wait for a while. After waiting you can see the result. This website has no malware so it looks clean.
But if your website had malware then it would look like this. you will see below the Malware type, Malware location, and danger level all detailed
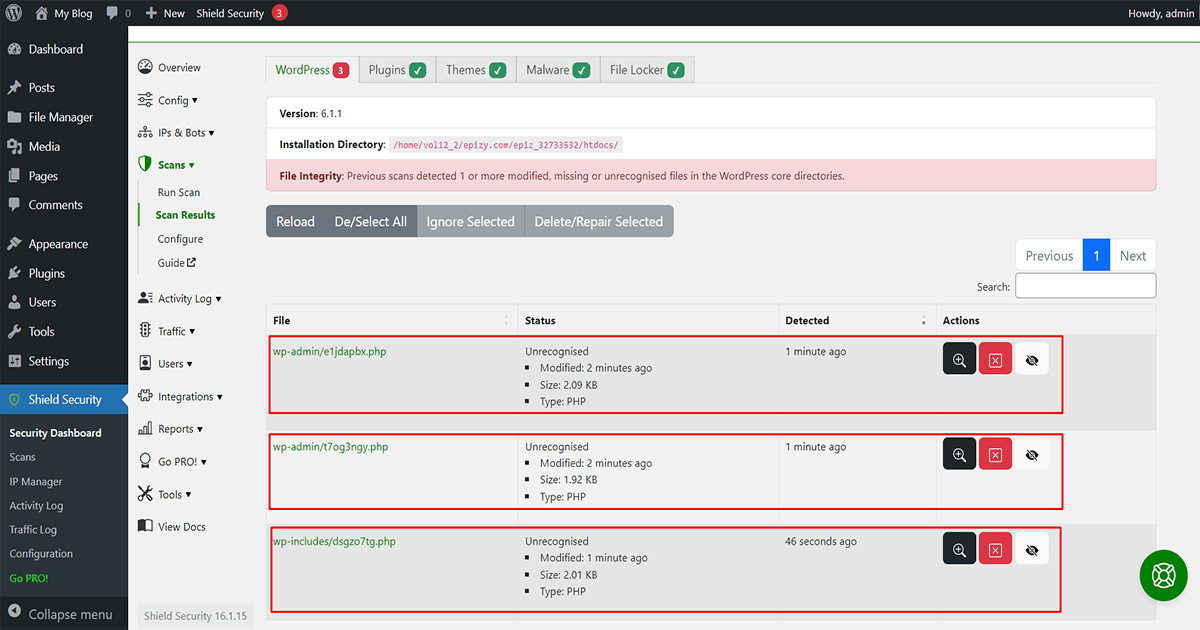
Now Removing this malware is very simple. This malware can be removed in two ways. If you want to remove all malware at once then follow click (1) then click (2). If you want to remove malware one by one follow the (3).
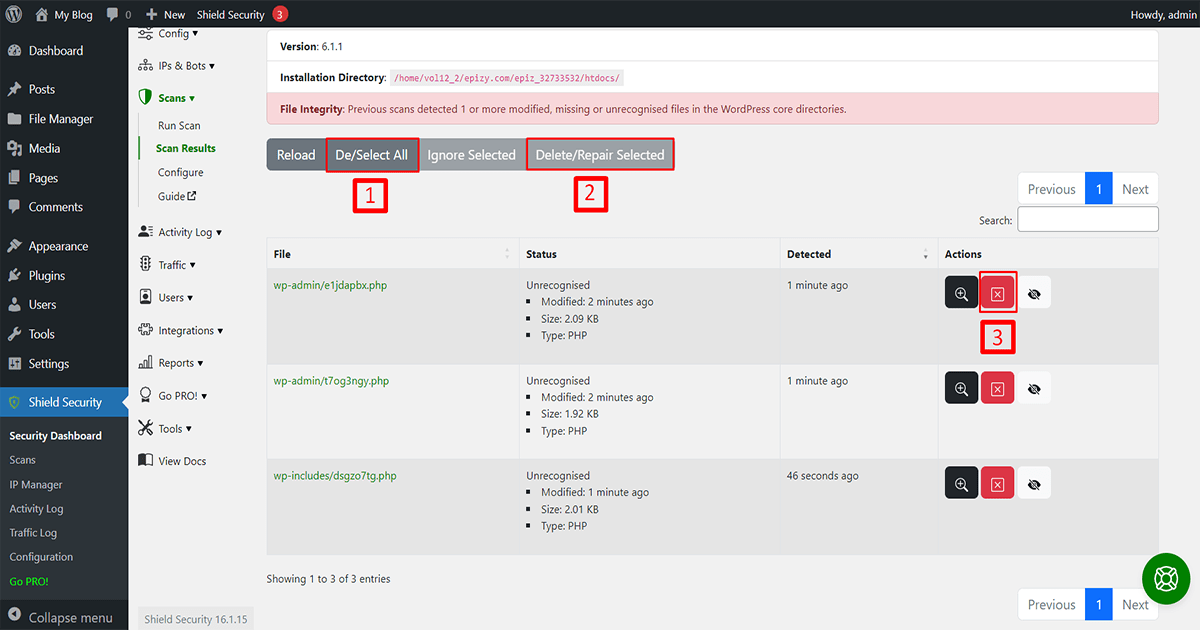
Warning: Simple malware that can be solved by deleting follow this process for these malware but if you find any malware modifying your main WordPress file or your theme file or any plugin file then get help for it from a professional before deleting it
Pro Tips: After removing the malware, you can further secure your website. How? let's see:
Use login Protection
Shield Security offers advanced login protection features such as two-factor authentication, brute force protection, and login limits to prevent unauthorized access to your website.
How to setup 2FA protection let’s learn the following steps:
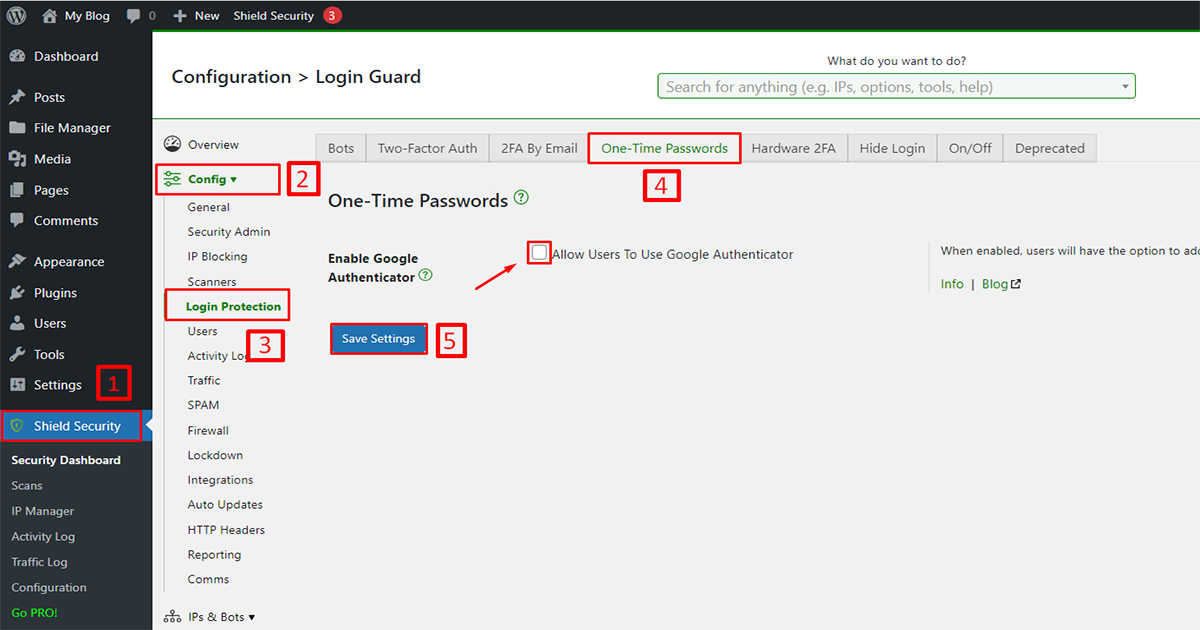
1. Go to Shield Security
2. Click on “Config”
3. Click on the “Login Protection” button.
4. then click on the “One-Time Passwords” and tick the radio button (Allow Users to Google Authenticator)
5. and click on the “Save Setting” to save it.
Now your 2FA protection is successfully configured.
Admin URL Redirection:
How to hide the WordPress login page let’s learn by the following steps:
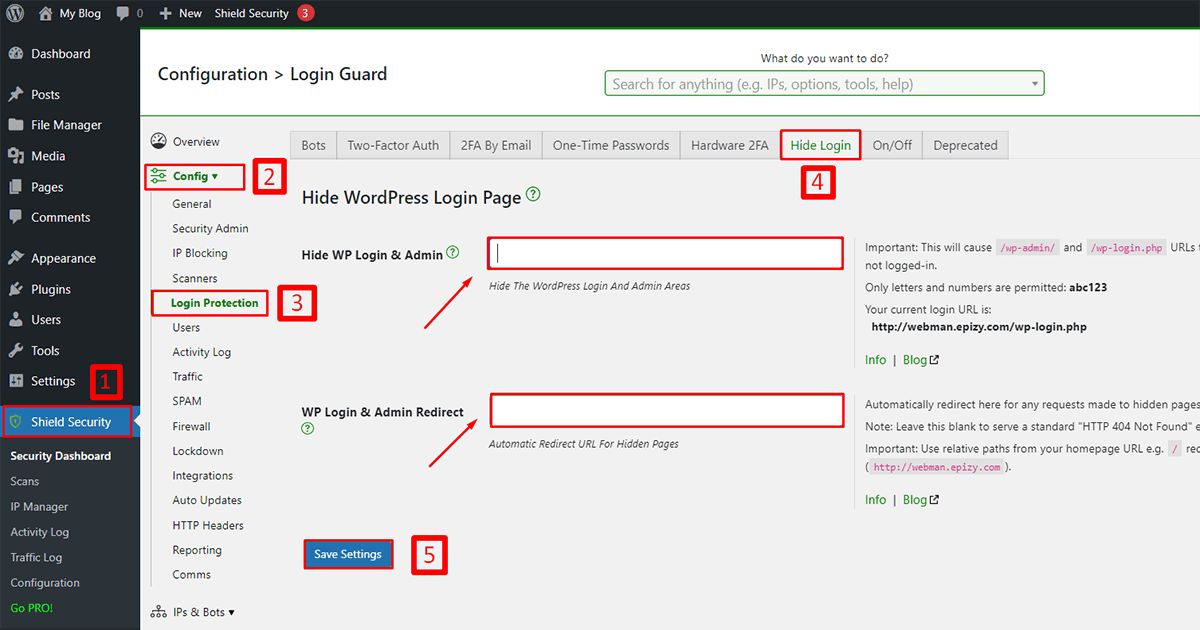
1. Go to Shield Security
2. Click on “Config”
3. Click on the “Login Protection” button.
4. Then click on the “Hide Login”
now type your admin URL which you want to hide and type your redirect admin URL which you log in with.
5. and click on the “Save Setting” to save it.
Now your hide WordPress login system is successfully configured .
Use firewall Protection
The plugin includes a web application firewall (WAF) that helps protect your website against malicious traffic and attacks.
How to Enable Firewall to let’s learn by the following steps:
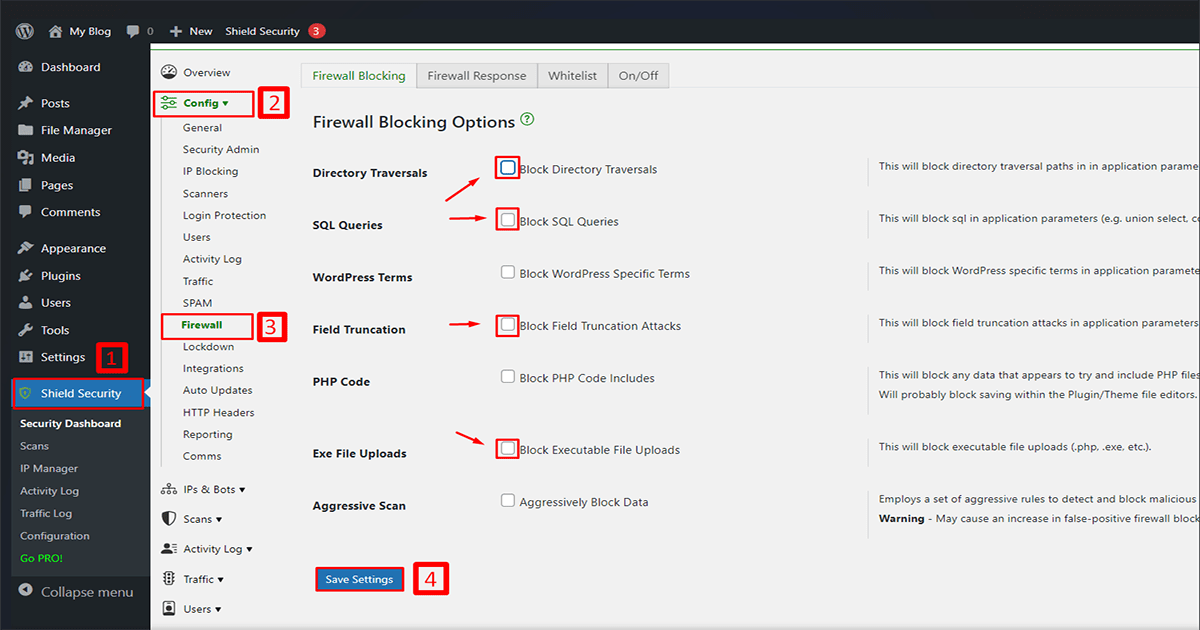
1. Go to Shield Security
2. Click on “Config”
3. Click on the “Firewall” and tick the radio button as your need.
5. and click on the “Save Setting” to save it.
Now your Firewall protection is successfully configured.
Bruteforce:
How to setup brute force protection let’s learn by the following steps:
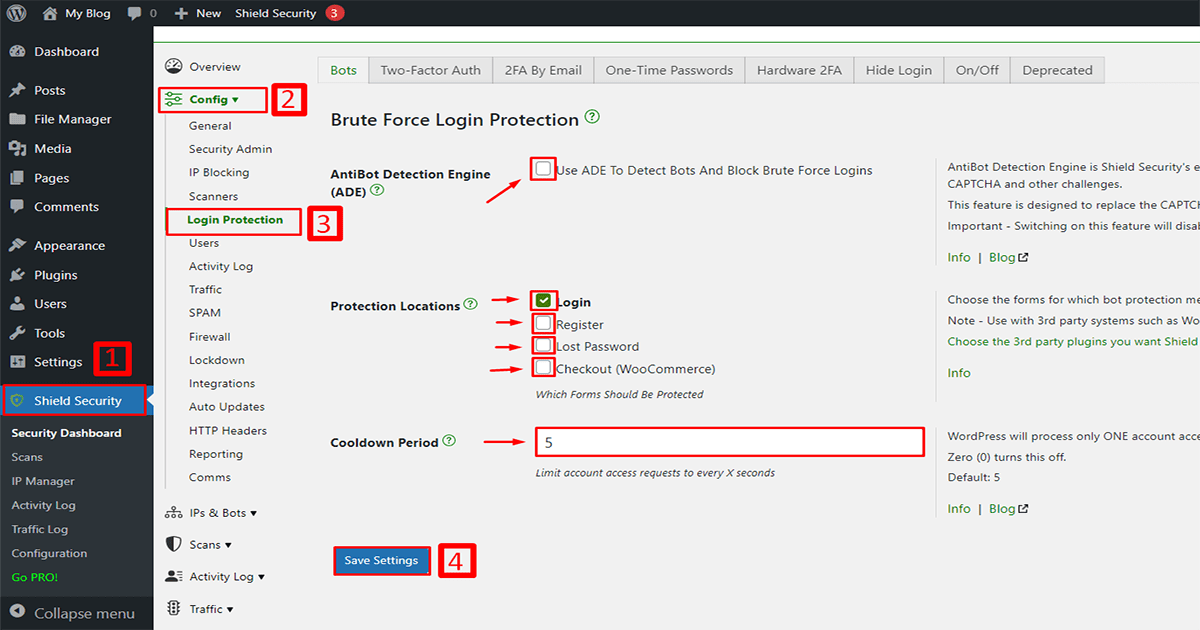
1. Go to Shield Security
2. Click on Config
3. then click on the “Login Protection” button and tick the radio button as your wish.
4. and click on the “Save Setting” to save it.
Now your brute force protection is successfully configured.
In addition, Shield Security is an excellent plugin for WordPress that provides a wide range of security features to protect your website from online threats. Whether you’re a blogger, an online store owner, or a business website owner, this plugin is a must-have for ensuring the security and integrity of your website.
