To use Wordfence Security, you first need to install the plugin from the WordPress plugin repository. Let’s learn how to install Wordfence security plugin your website:
First , Go to your wordpress dashboard and Follow the steps
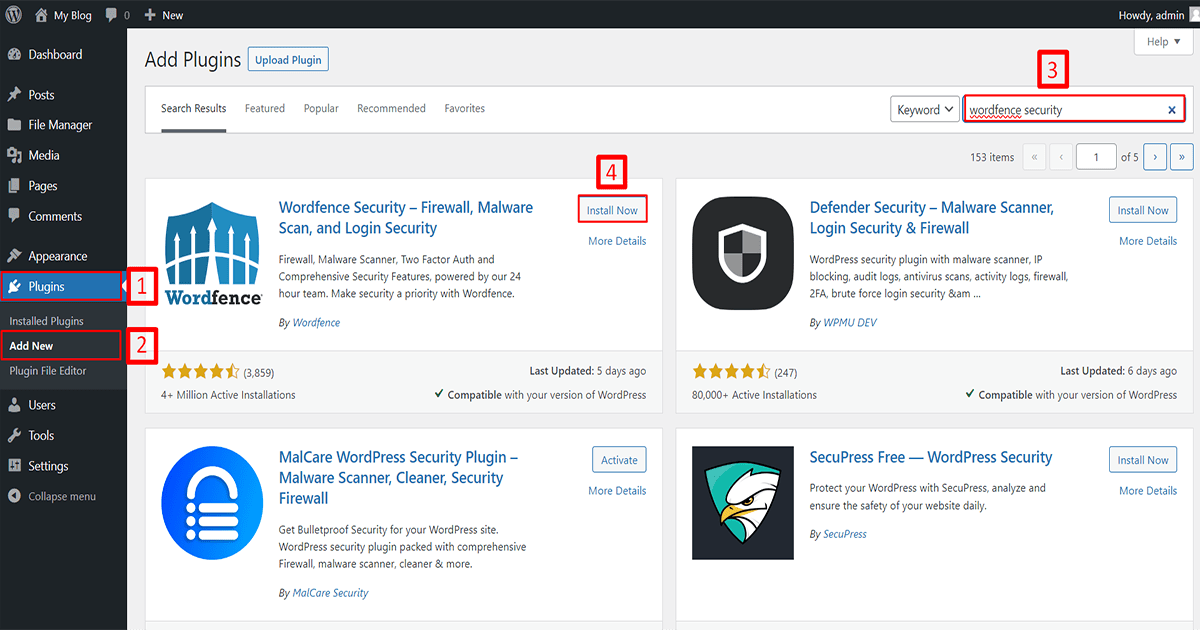
- Go to Plugins
- Click on Add New
- Search for the “Wordfence security” plugin,
- Click on the “Install Now” button and install it.
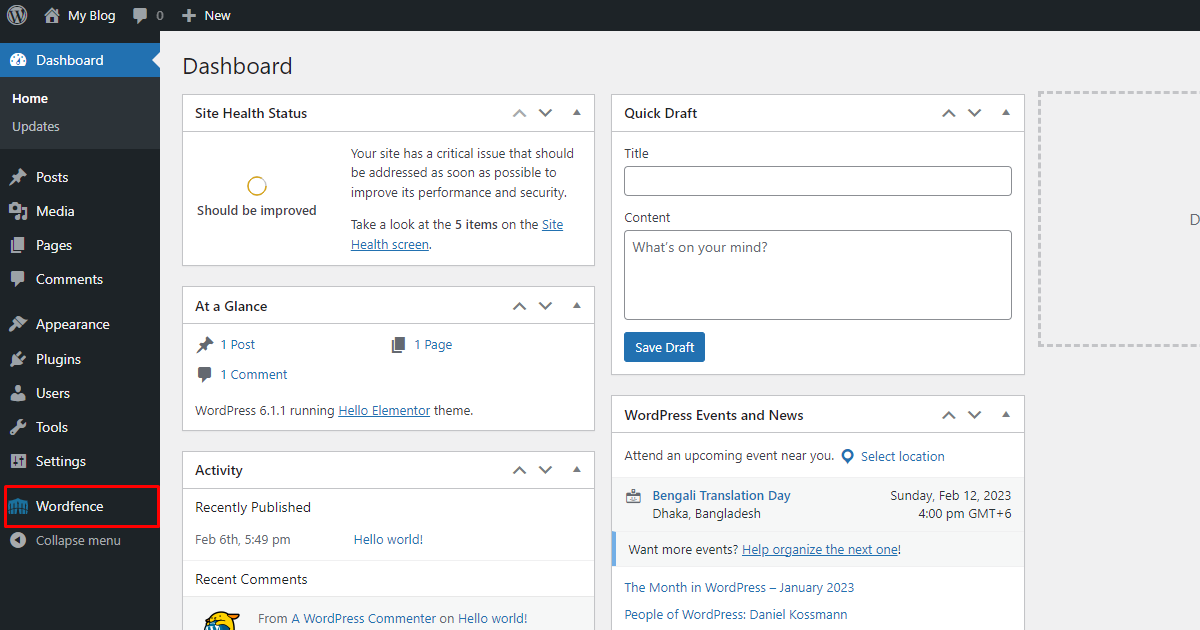
The installation process takes some time so wait a few moments. After that click to activate the plugin. Now the installation process is complete. You can see the plugin below
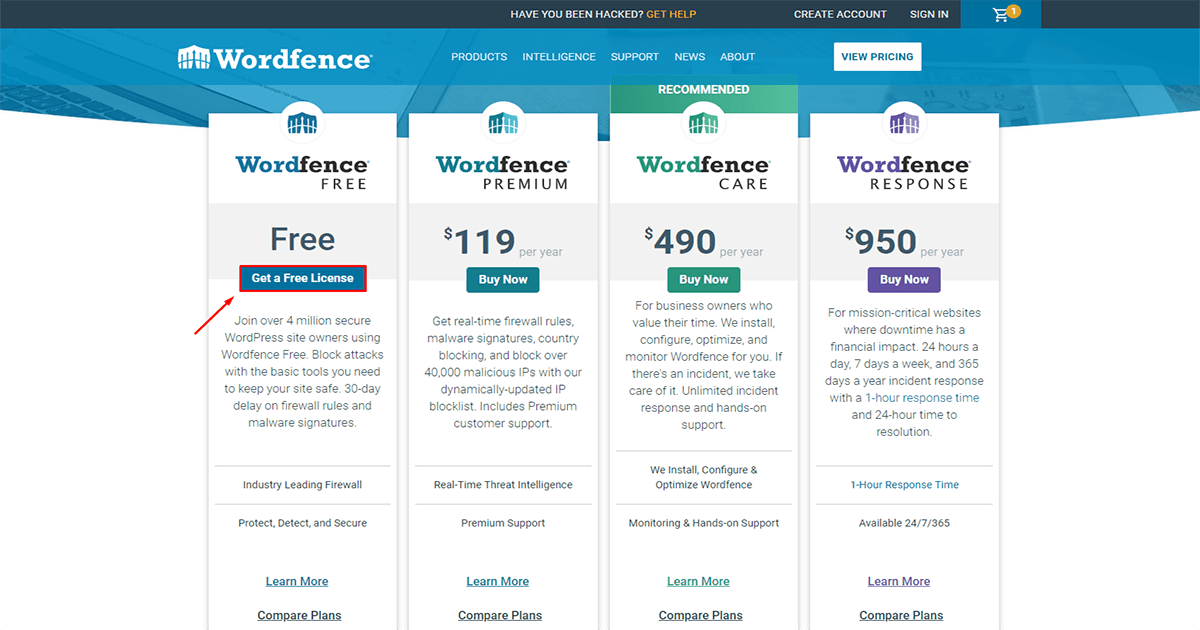
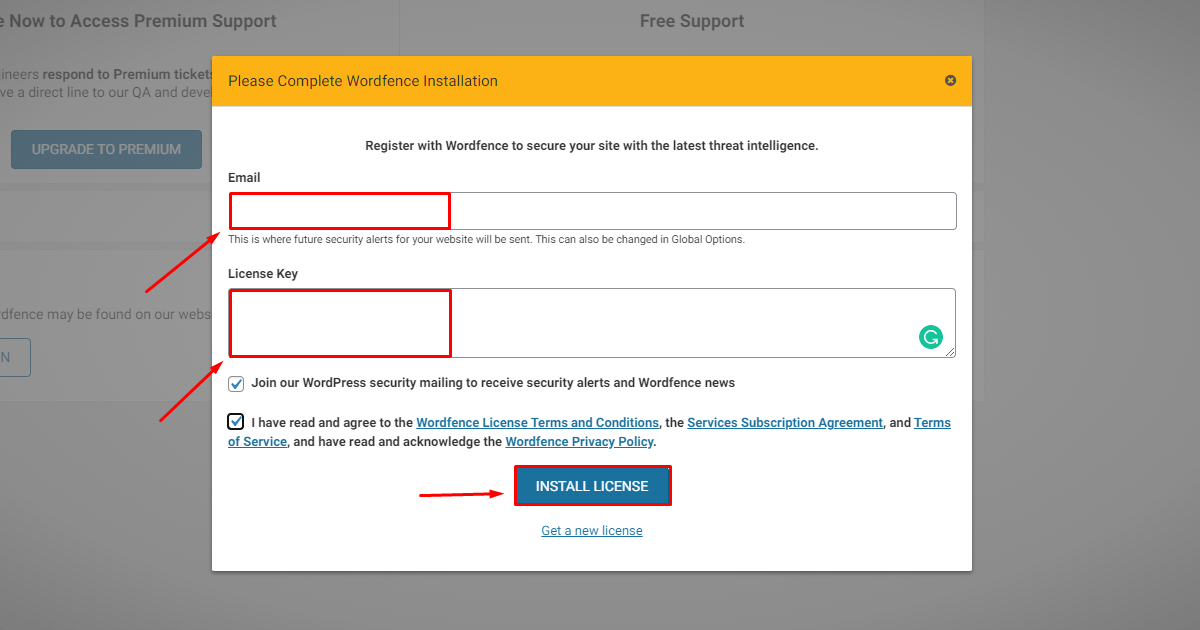
But your security plugin doesn’t work because every security plugin needs a license key so get your license from their official website.
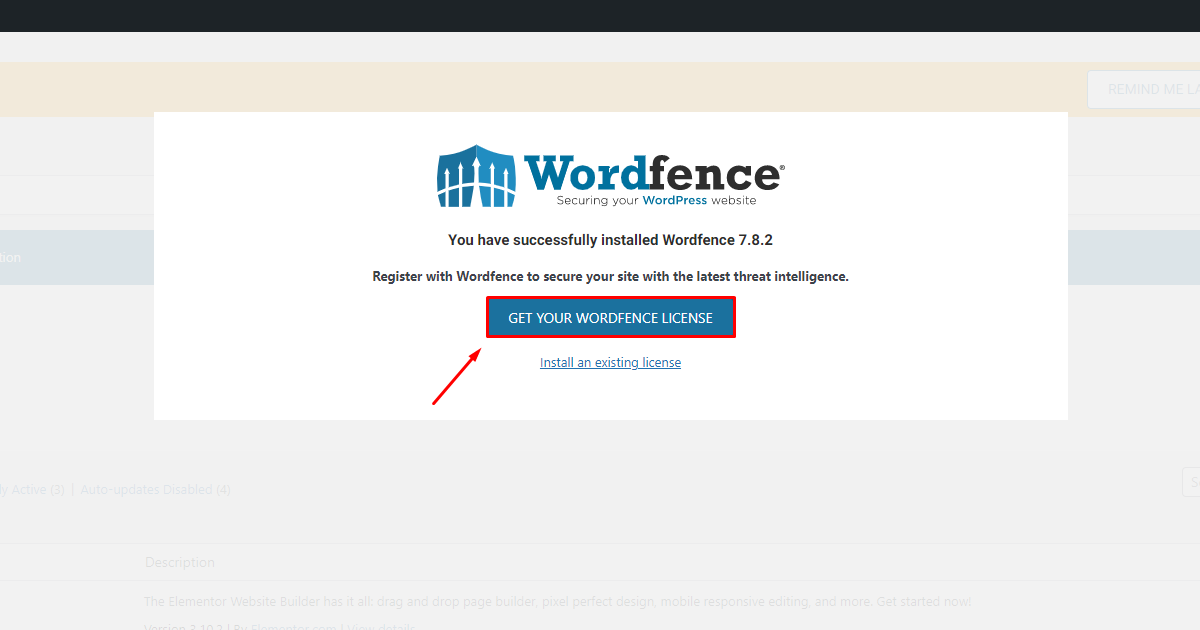
You can buy a premium version for your website. But we will use the free version
After getting your license key, Go to your security plugin Dashboard. Put in your Email id and License key, and click the install license button
Now, your security plugin is fully activated
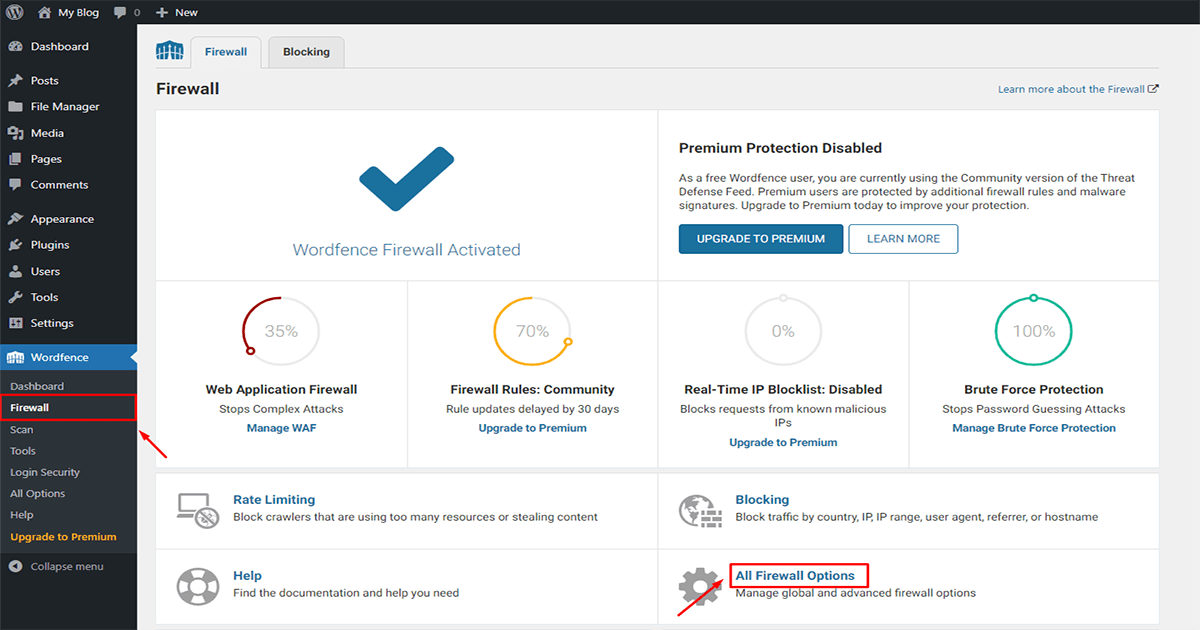
Your plugin is fully activated but still not working yet because it needs to be configured before it works properly on the website. Also for it to work properly its firewall needs to be set up first usually your firewall is in learning mode we need to take it out of learning mode and put it in protecting mode then it will start working properly we will learn how to bring it from learning mode to protecting mode:
First go to your Wordfence dashboard and click on the firewall > all firewall option
Then you can see the “Web Application Firewall Status” option and learn mode is set there. You go there set protection mode and save it.
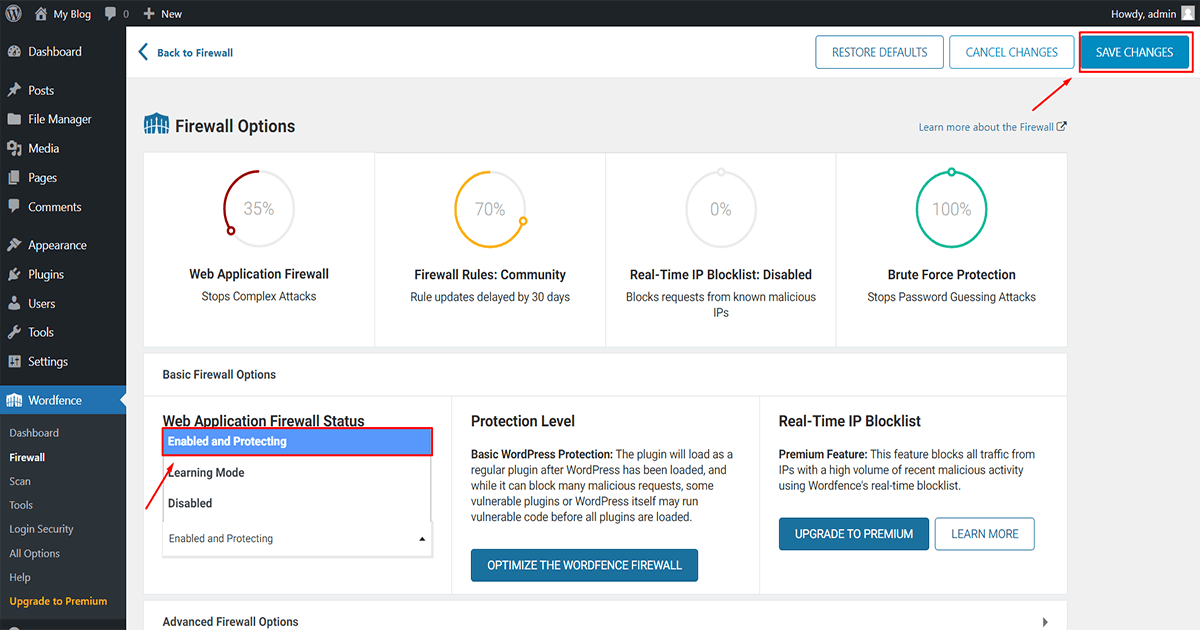
Now your firewall is set up and WordPress is starting to work with its proper capabilities
After installing the Wordfence Security plugin, Now you can scan your website to find out if there is any virus on your website and remove it easily. Let’s learn how to scan websites:
First go to your Wordfence dashboard and click on the scan > start new scan
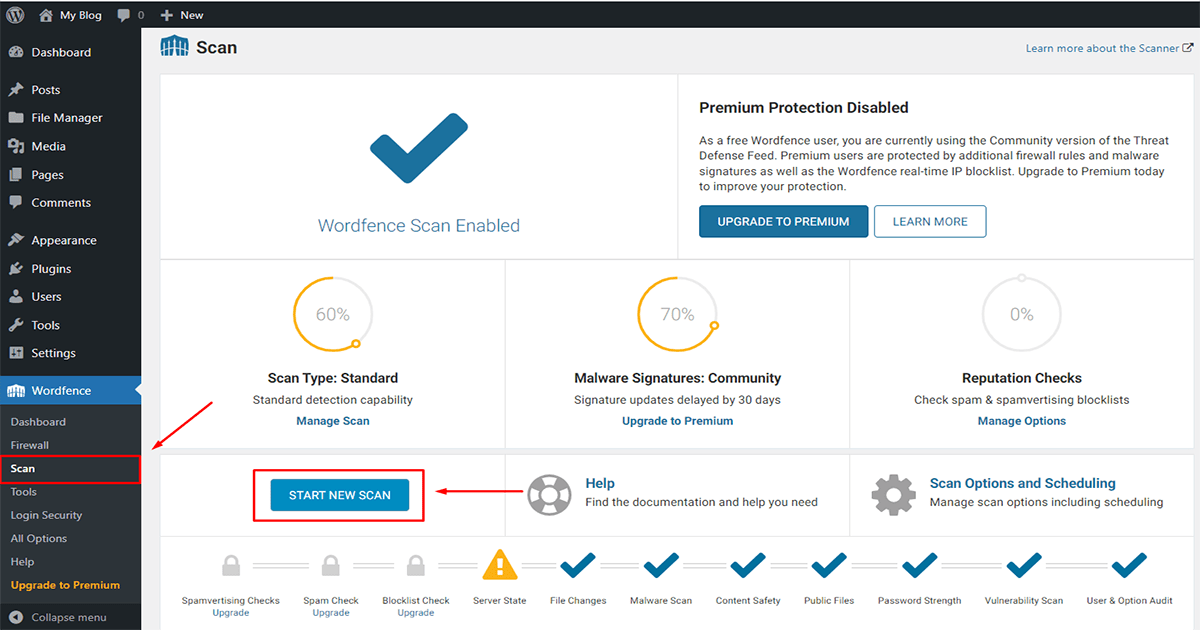
The scanning process takes some time so wait a few moments. After that you can see the result
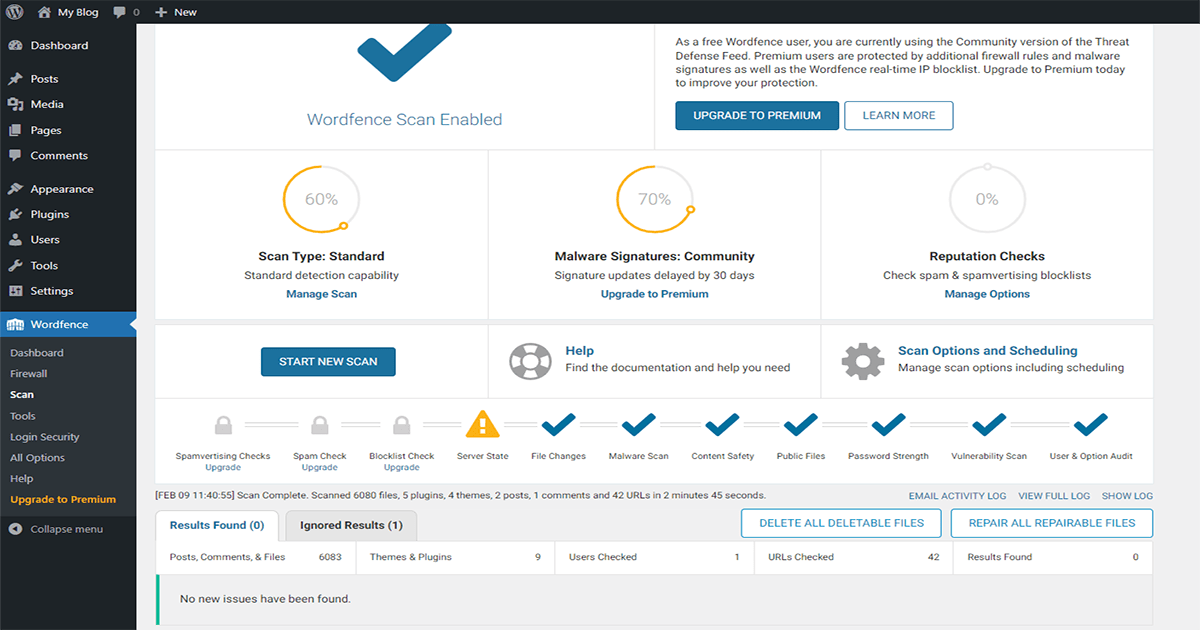
Our website has no virus so it looks clean if there was any virus it would show below. Now we will see how to show if there is a virus on our website.
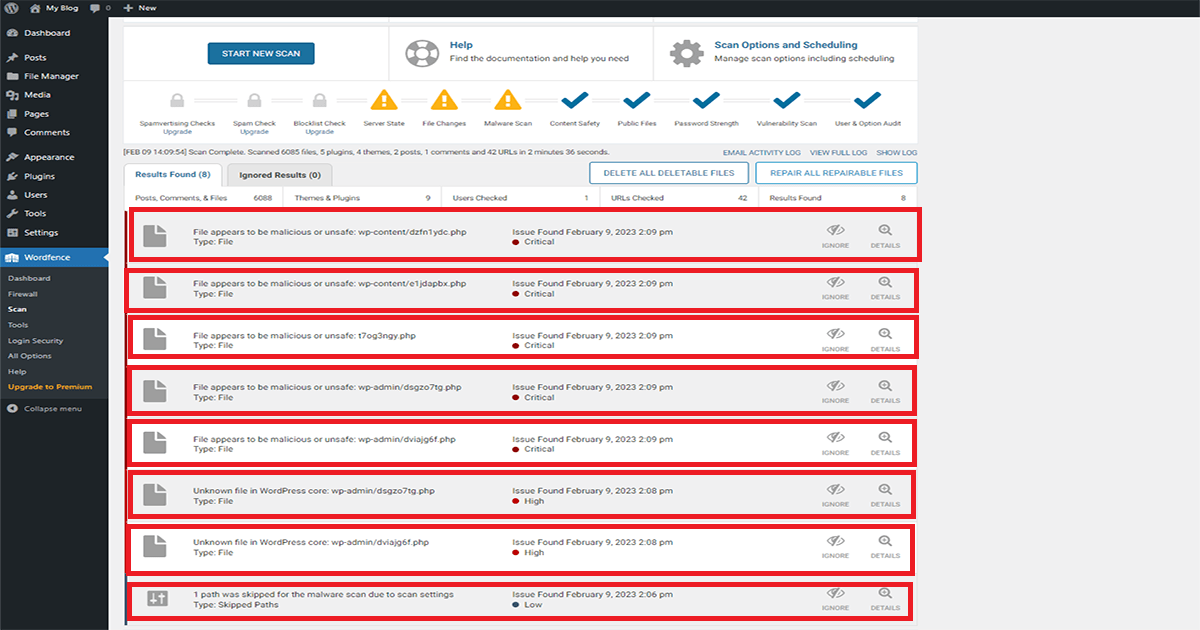
If Wordfence Security detects malware on your website, we will show you how to remove it. You can remove the malware by following these steps or by contacting your web host for assistance.
After catching the virus, click on the virus and see the location of the virus
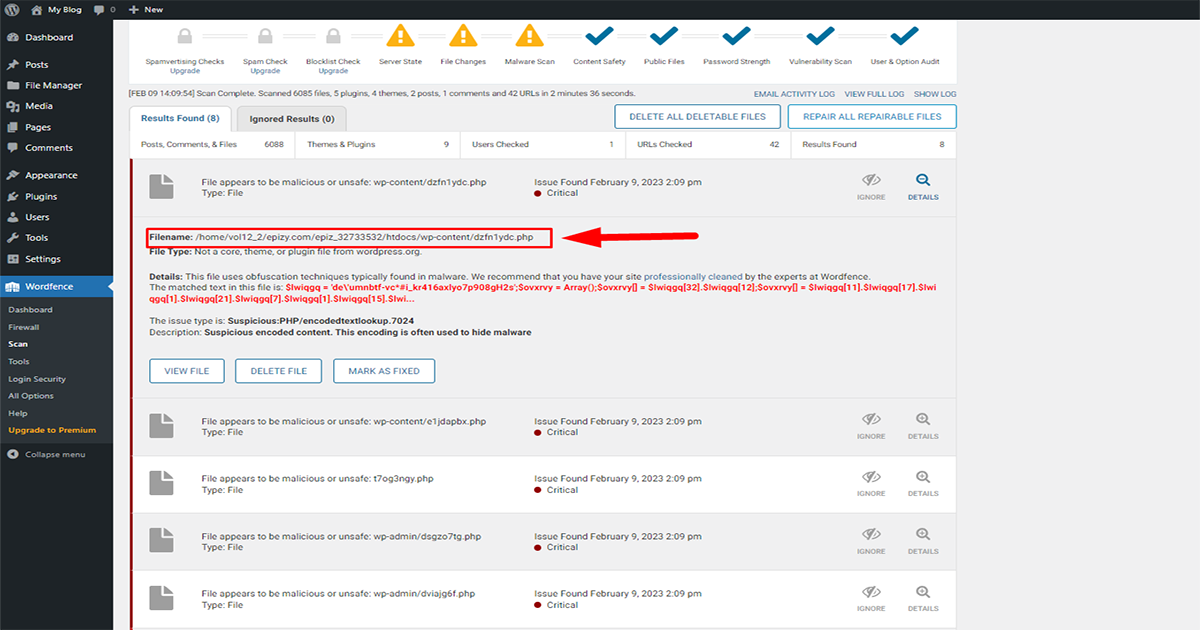
Next you need to enter your hosting panel and go to file manager.
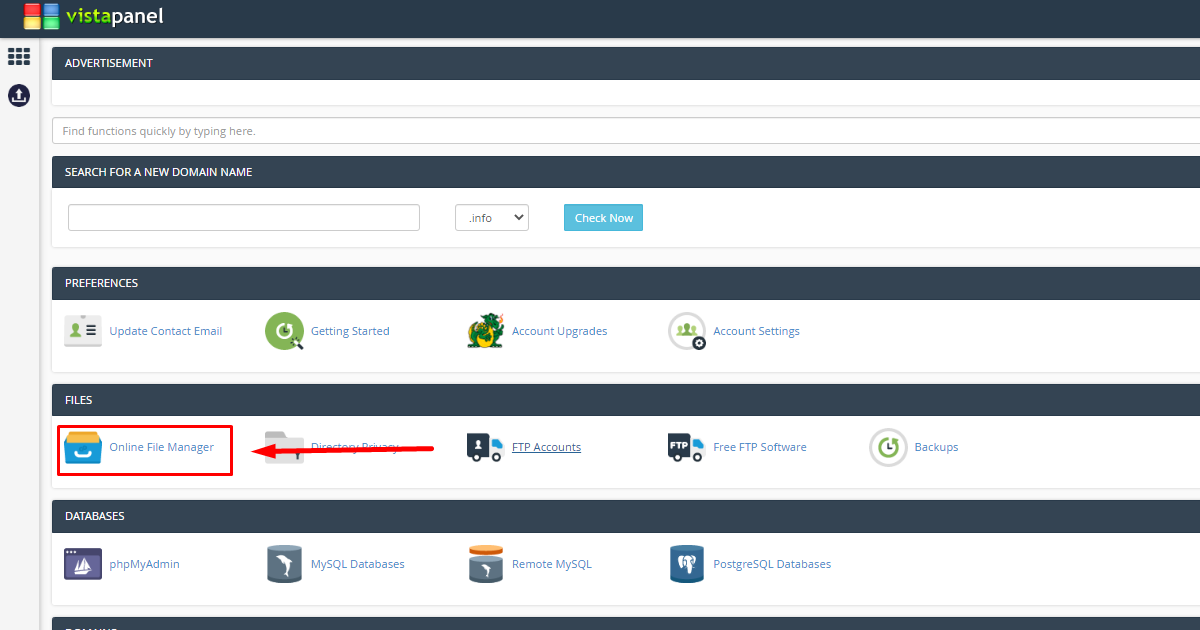
By entering the file manager you will find the location of the malware. We found the location of our malware inside the wp-content of htdocs
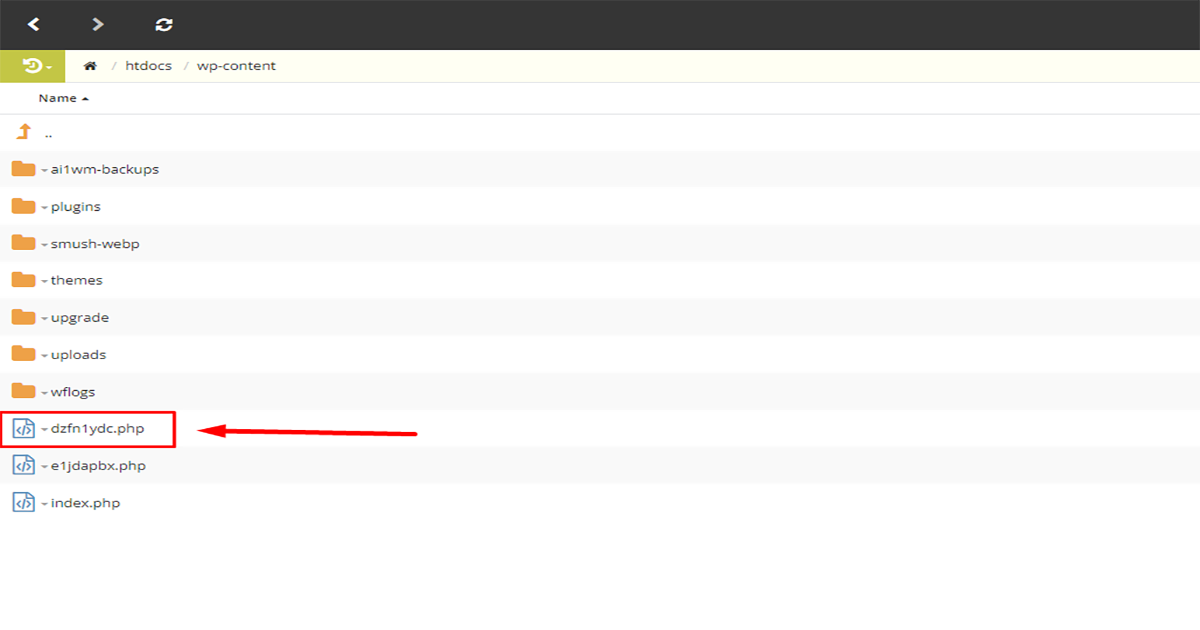
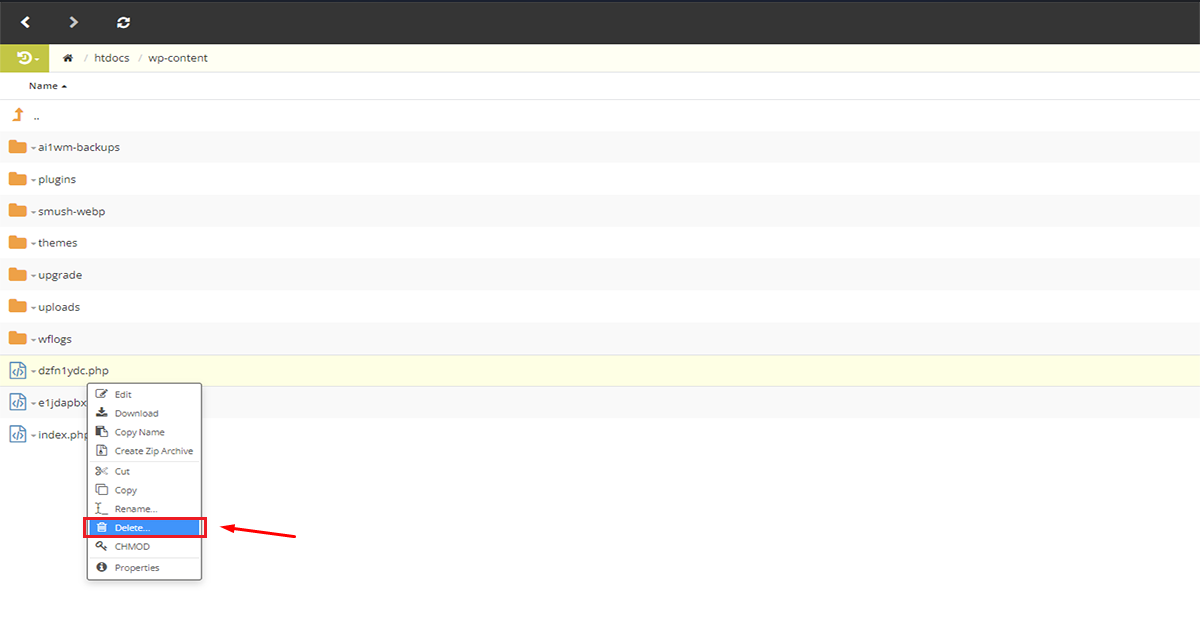
This is the virus, now it’s time to delete it, now if you click the right button on the virus, you will see the delete option.
If you confirm the delete option, your virus will be deleted completely
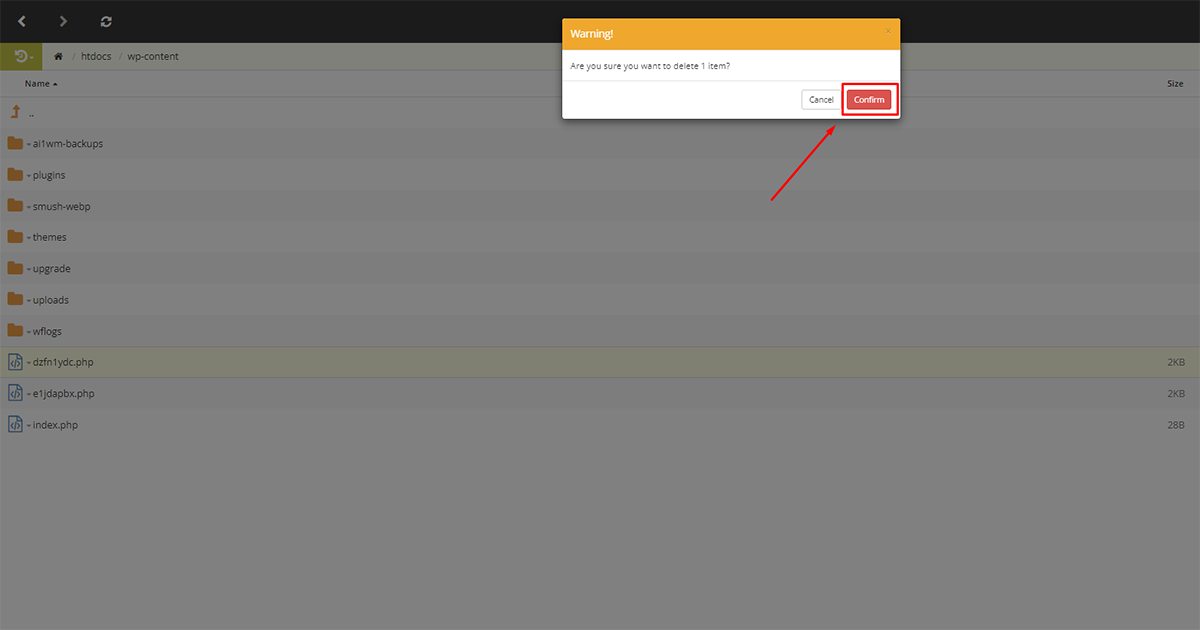
In this way the website can be kept completely virus free by locating and deleting the virus in a very short time
 Chat with Us